Many years ago someone told me this interesting fact about how people receive compliments and it went something like this:
“If a person receives a compliment, even if they know it is disingenuous, they still feel better about themselves.”
What? This made no sense to me, how would that even be possible. If I was having a terrible day and someone I knew didnt care said something nice about me I’d feel better? Madness, our brains need an upgrade. But I started reading the paper for some clues – at present I cant find the initial one, but there are a few others here and here. The second one actually talks about people performing better after receiving a compliment, but you get the picture.
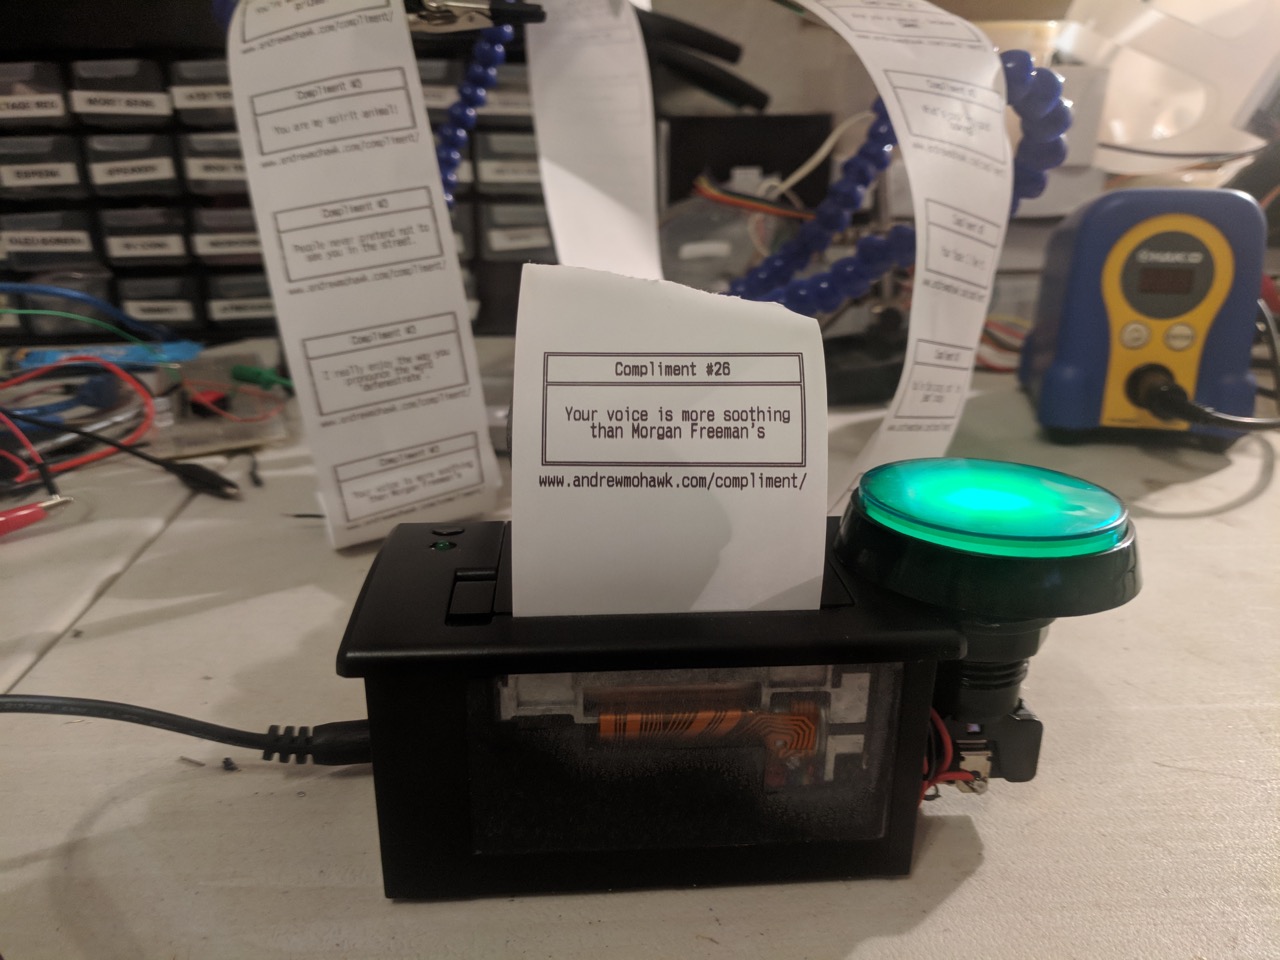
But after reading this I had an idea to build a compliment printer, something very basic where you press a button and receive candy .. a compliment. So I set off building one. I had the parts from various other projects it. The biggest hassle was fitting everything inside the printer, but I think it came out nicely :)
Check out this video of the Printer in action!
Where is it?
I figured I would put it at a bar as often (myself included) people find it easy to go to a bar if they are feeling down. I also LOVE punk rock and its often played at Surfarosa, one of my favourite bars. I don’t know if it will get rekt or have beer poured all over it or be taken, but its at the bar at the moment. So if you want to go get a compliment head on down there!

Also one of the bartenders left a comment on my Facebook post which is kinda awesome:
Build process after the break!
Build Process
The project had very few components:
– 9v power supply with barrel adapter
– Barrel jack connector
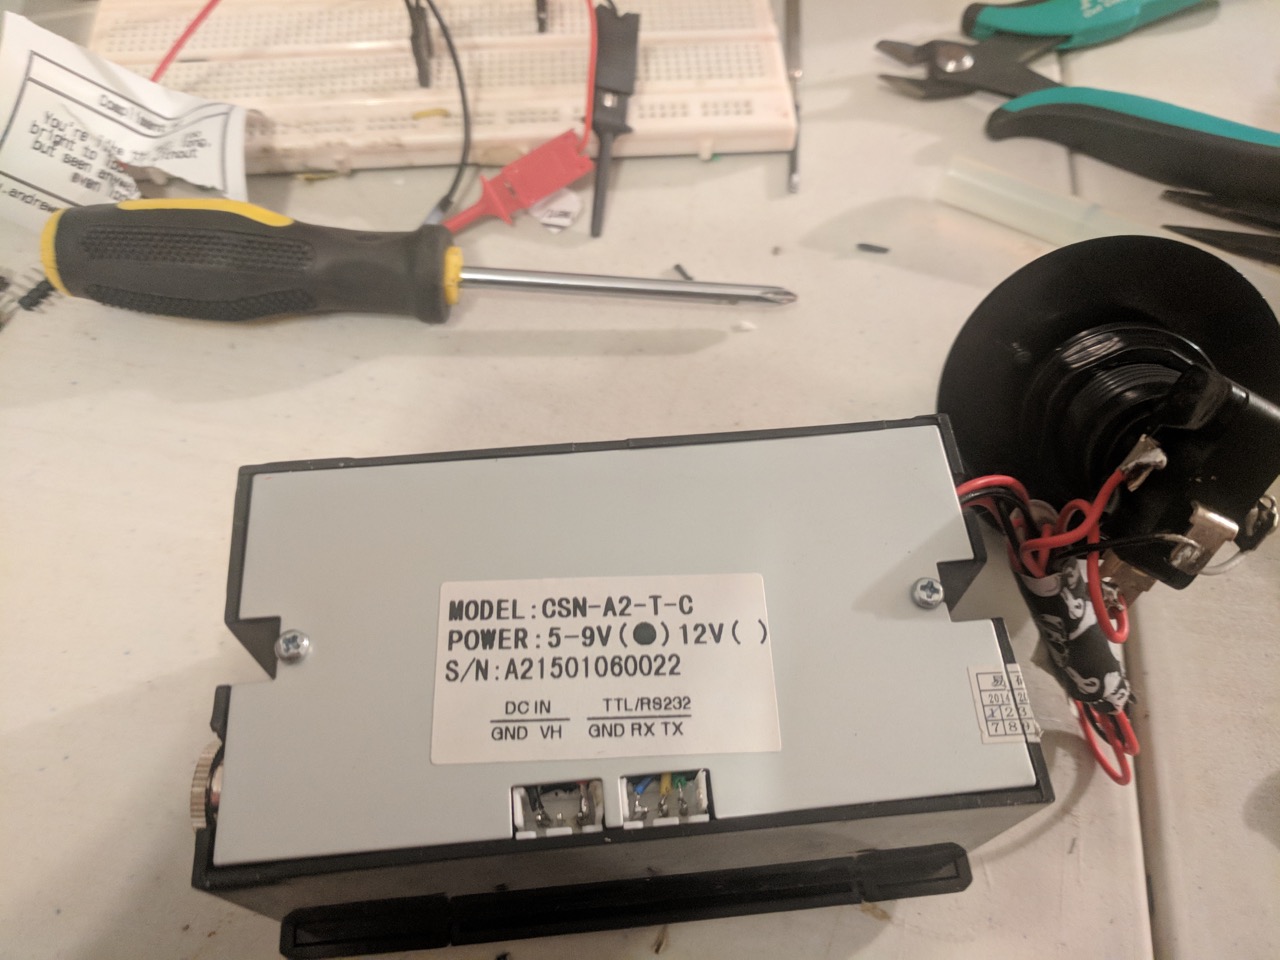
– Thermal Printer
– $2 Arduino nano clone
– Buck convertor
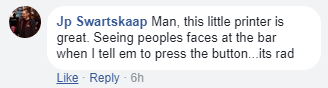
The programming was fairly trivial, I set up one of the $2 Arduino Nano clones ( with that pesky CH340 chip ), wired it up to the thermal printer and started printing. This would be easy! Initially was ready to give up, I ran through some of the examples but the printer printed _really_ _really_ slowly, like 30s for a tiny piece of paper, and then the quality was all over the place, some too dark, some too light. I spent a good few days tweaking the properties until it worked just right with my printer and that particular Arduino Nano. The basic change that I needed to make was firstly to change the dotPrint time, which, as I write this up, I see there as a function for, DOH! Its over here, setting that from the default ( 30000 to 1000 — from 30s to 1s) made a huge difference. Then secondly playing with the heatTime determined how easy it was to read vs how much smudging could be seen. For my project I used 100 on one Arduino and 250 on another, so remember to play with that if you are building something with the thermal printer. The only other thing I found with the printer is it had a fair amount of draw to the point that I went and got a 9v 2A power supply for it.
Once I had got it printing I made a few compliments, which in general, where pretty trash. However my friend (@Wilmieeek) is an awesome copywriter and wrote me a bunch of much much better ones. I threw those into the app as compliments.h — so you are welcome to add your own or change the ones that are there! From there I was happily printing away.
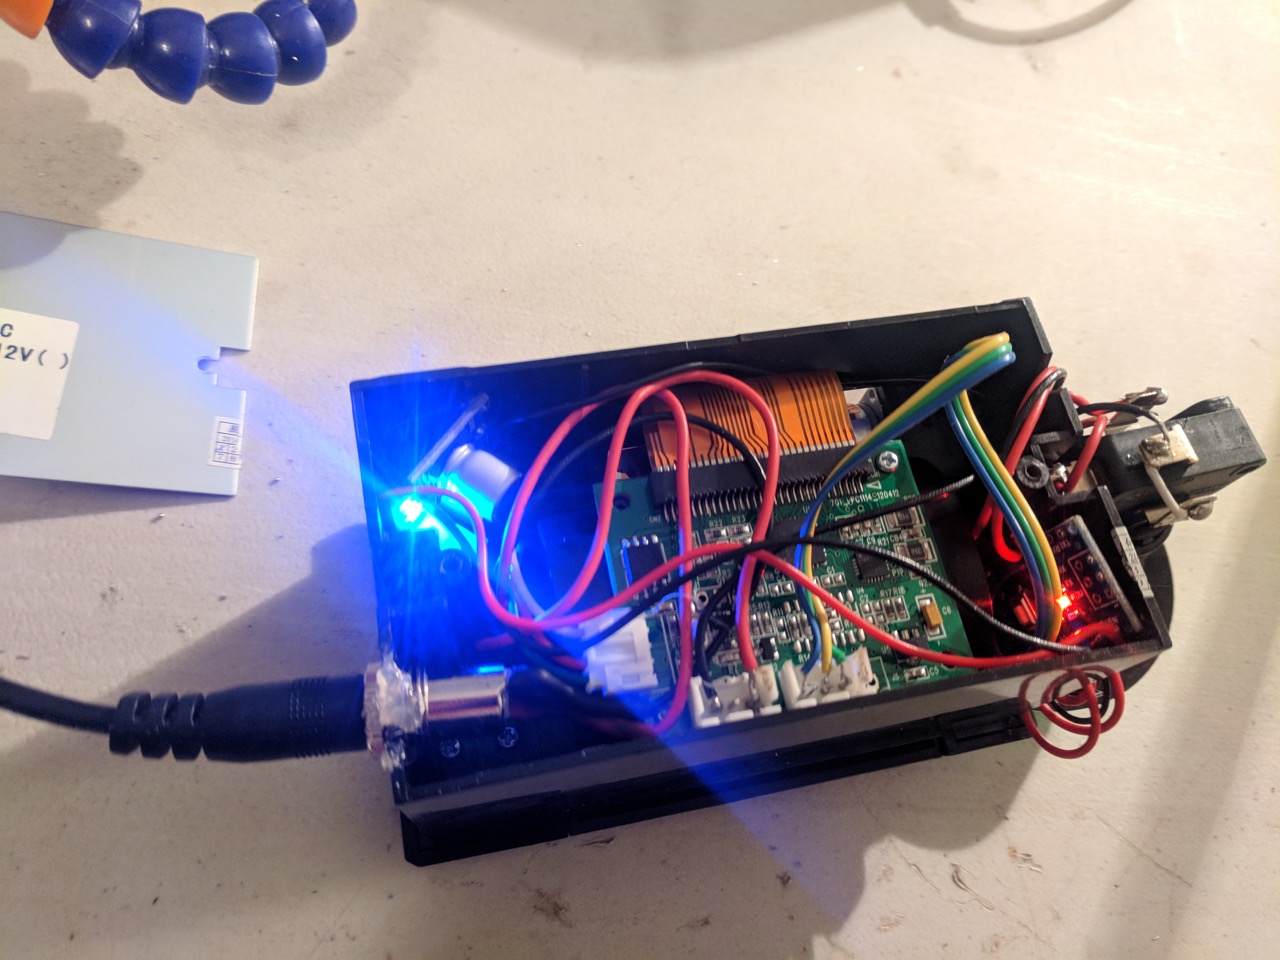
Next I had this fantastic little light up arcade button that I wired up with the super-easy-to-use bounce2 library to do debouncing, and I could finally have a press-button-get-compliment, compliment printer!

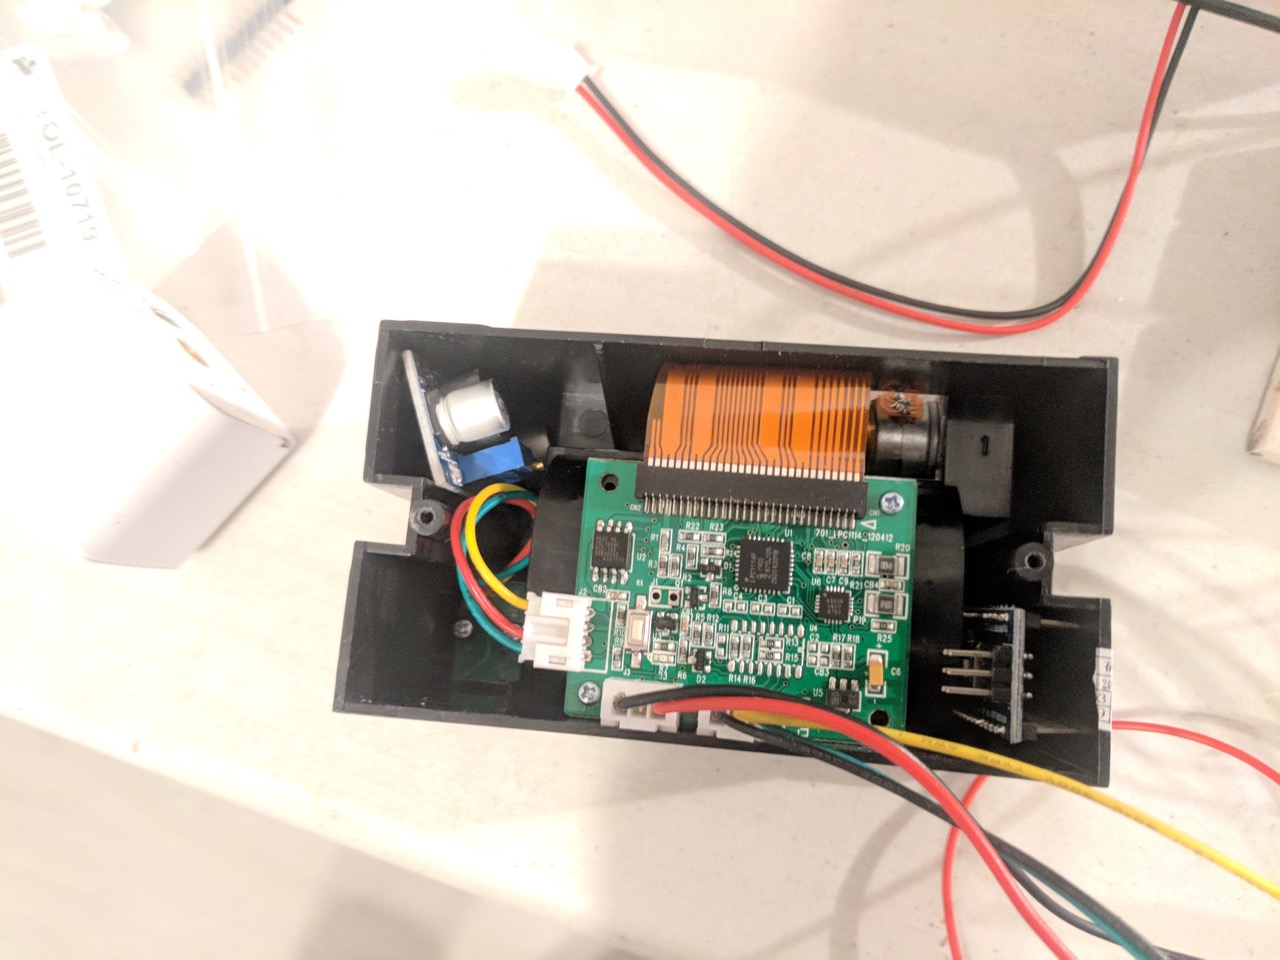
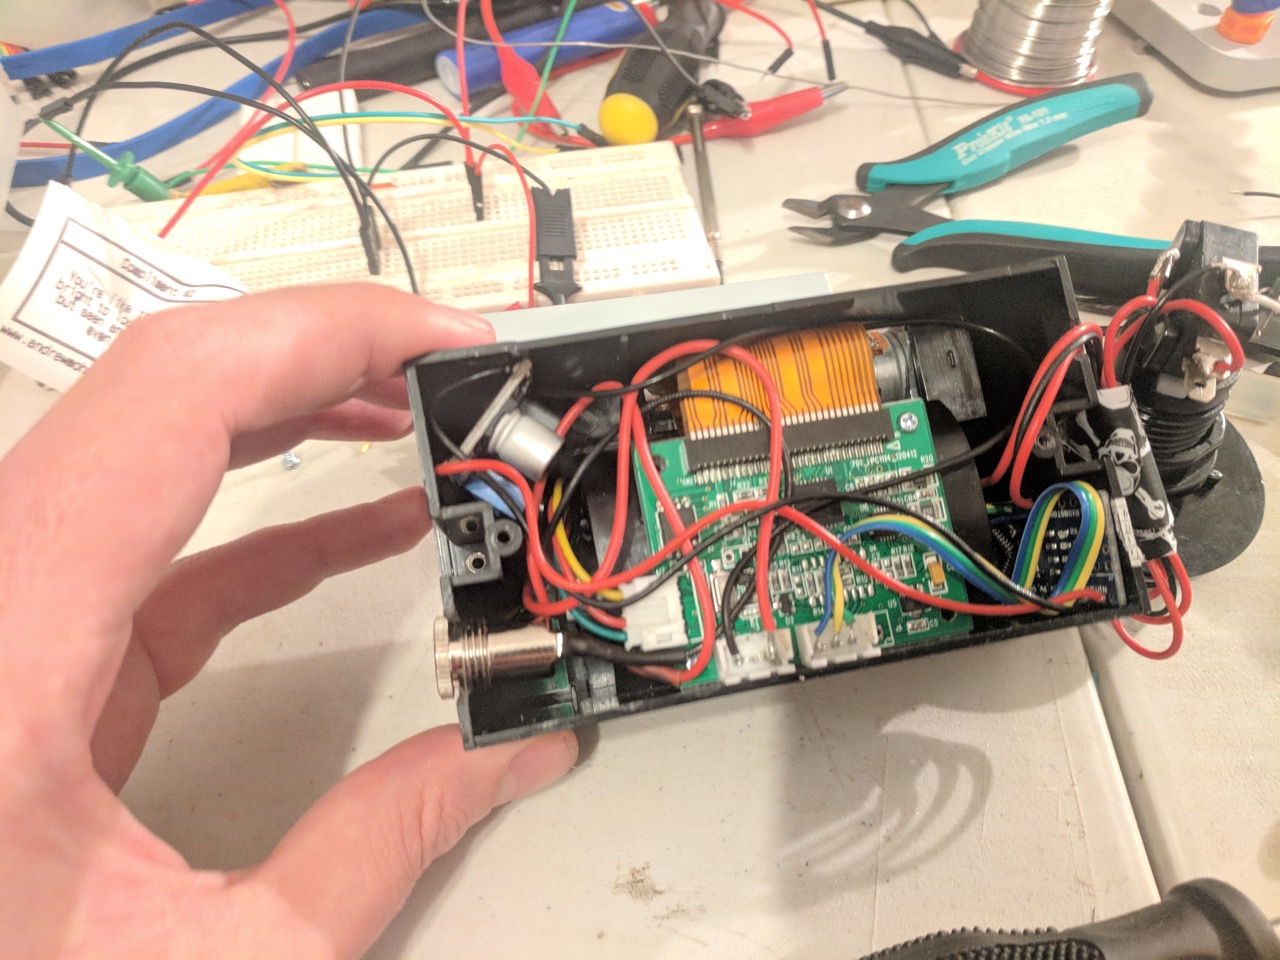
So now I had a working project I needed to get it to all fit together inside the printer! Opening it up I saw there is a fairly useful amount of space. Someone asked me a few days ago if I had designed a PCB specifically for it, and while I can see the value in learning from that I really don’t think it was necessary here, the $2 micro could easy fit and handle everything I needed!
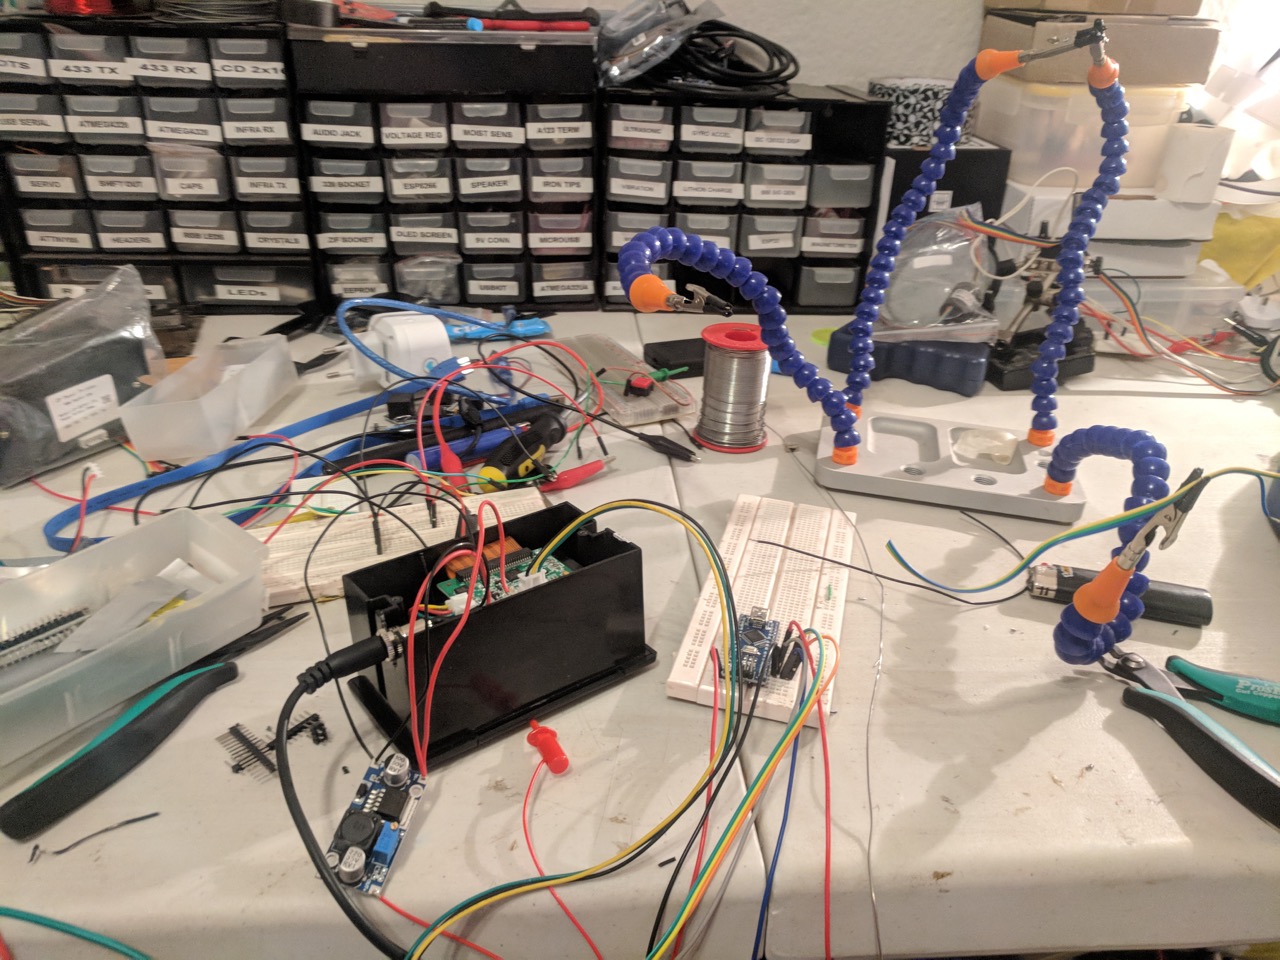
I needed to figure out some power stuff, as while the cheap Nanos are great, the first one I tried did not really appreciate the 9v supply as much as I’d hoped (it in fact decided that it would rather not exist than have a 9v supply — even though the box says 12v, but for the price I couldn’t complain). So I first started with a standard 5v voltage regulator but after getting a whiff of that fragrant burnt plastic smell I realised that if I was going to put it into the box it would probably be a fire hazard. So I got a standard buck converter which luckily could fit in the one corner of the box ( the opposite side to the Nano ). This meant that I wouldnt have to worry about it burning something down… at least not with this component!
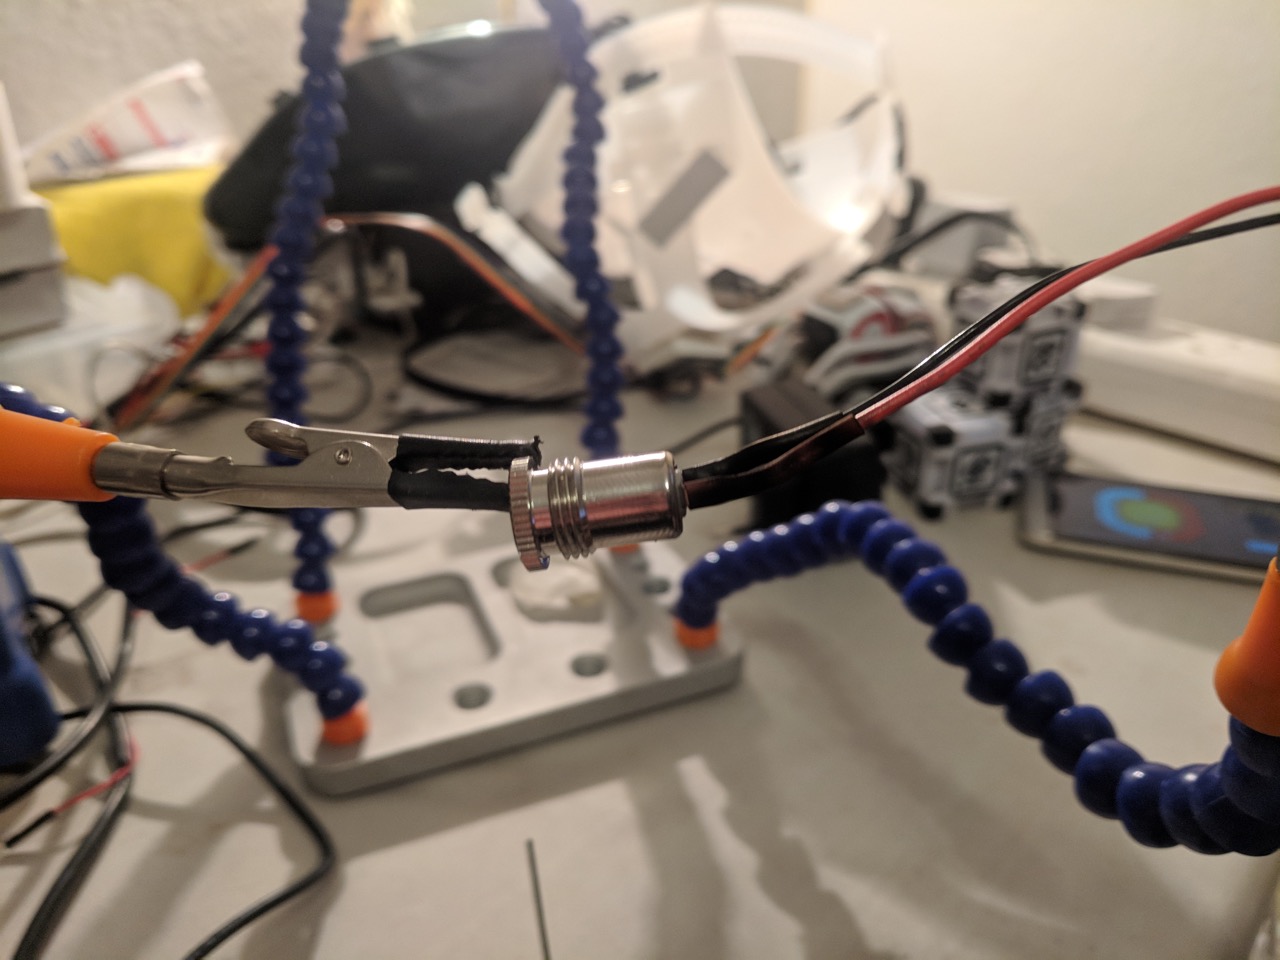
So now I had the power for the device figured out, 12v going into the 1 side of the buck converter as well as the printer and 5v going to the Arduino I had to piece this puzzle together. Most people would probably try and find the right tools for the job to get the barrel jack into the plastic such as a dremel, but I decided to rather use a pair of wire cutters and some glue to hold it together, needless to say if you are trying this, probably do the right thing ;)


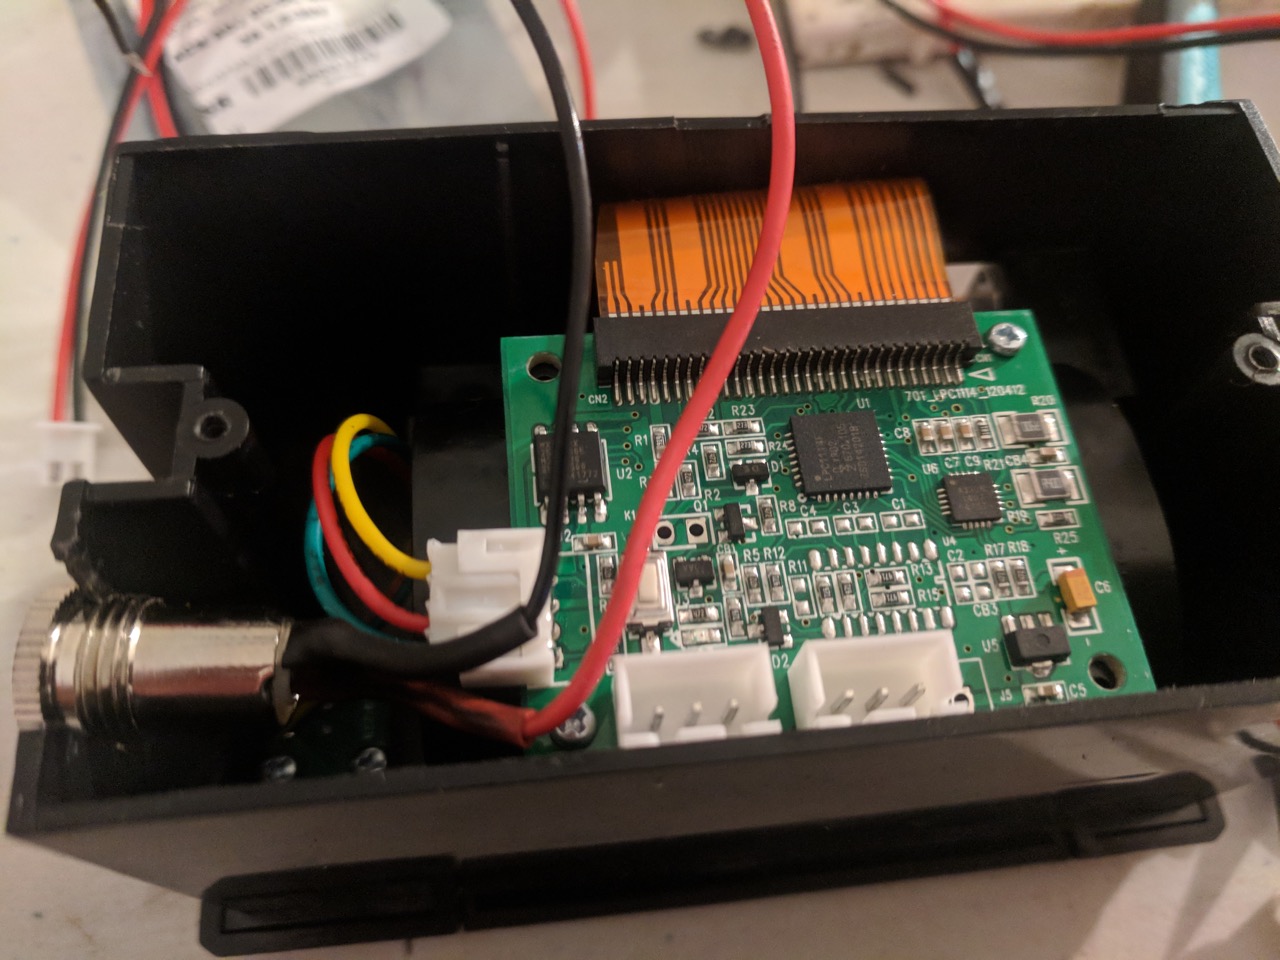
So after some not-so-clever glue work I had the power supply in place. On to the actual connectors for the printer. Because most of the cheap printers are meant to be mounted through hole the damn connectors at the bottom are actually sticking out of the base that creates a very uneven service and a wobbly printer if you want to just have this sitting on a table. So to solve this I got out my trusty cutters for the second time, destroyed the plastic housing for the connectors and soldered directly onto them and then to the Arduino.
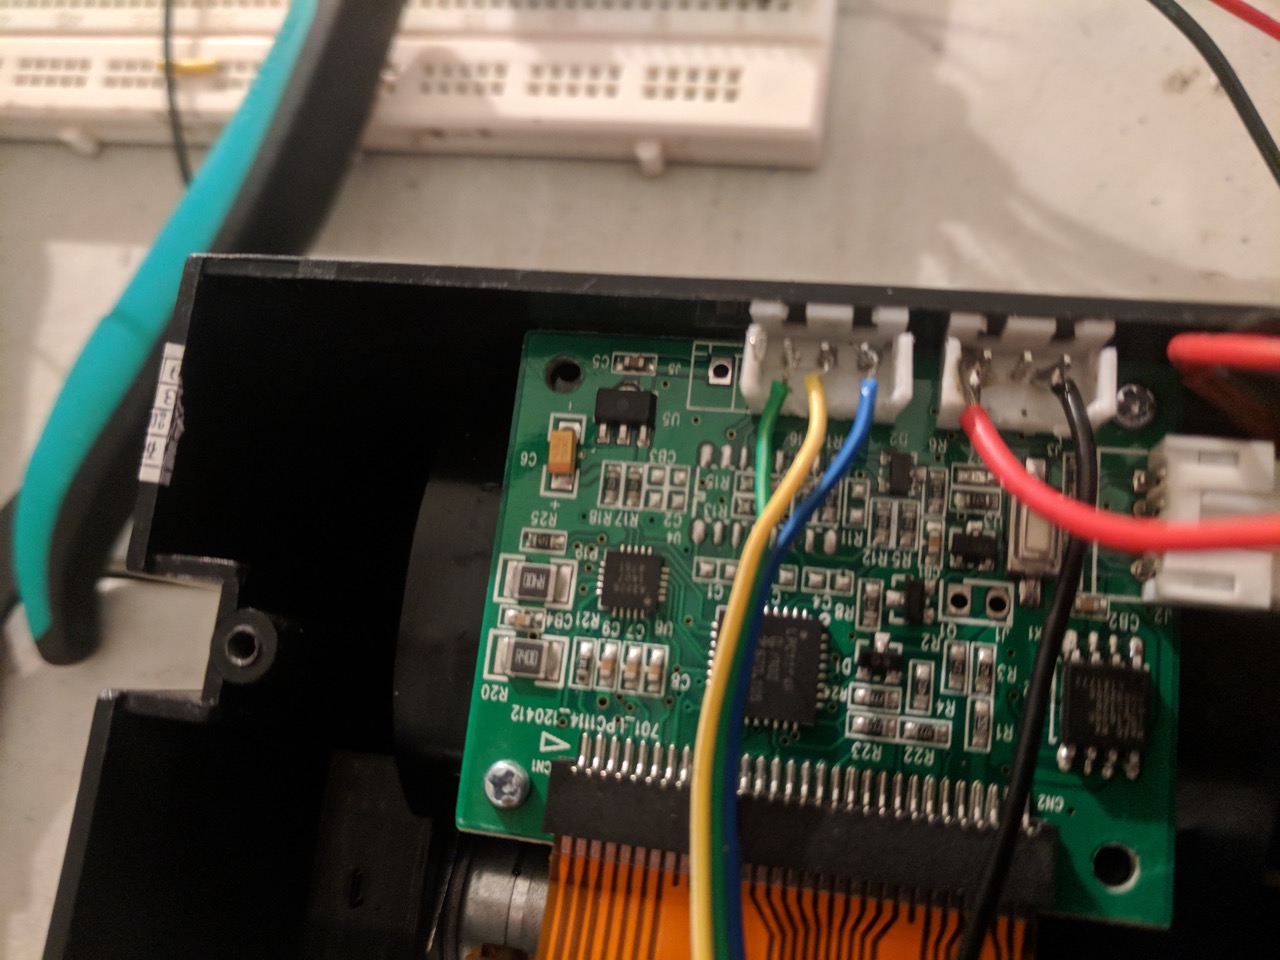
Lastly was basically just crushing everything into the printer box while also cutting a hole on the other side for the button and wiring everything up. The power of brute force got me there pretty quickly.
Lastly I used some more glue (I’ve only recently discovered the joy of a gluegun) to attach the button to the outside of the printer so it is more of an all-in-one unit. Naturally because I do before I think, I left waaay to much cable for the button and had to end up having it outside the base, I’ll fix it if I build another one. However overall the build was pretty decent and it seems fairly robust.

I had a cool time building it and hopefully it makes even just 1 person feel a little bit happier in these often dark times.
-AM
[…] So, he put together a thermal printer and a hilariously large button with an Arduino and created a machine that prints compliments. And where best to put a machine that prints out compliments? The local bar, where […]
[…] So, he put together a thermal printer and a hilariously large button with an Arduino and created a machine that prints compliments. And where best to put a machine that prints out compliments? The local bar, where […]
[…] So, he put together a thermal printer and a hilariously large button with an Arduino and created a machine that prints compliments. And where best to put a machine that prints out compliments? The local bar, where […]
[…] So, he put together a thermal printer and a hilariously large button with an Arduino and created a machine that prints compliments. And where best to put a machine that prints out compliments? The local bar, where […]
Very cute.