
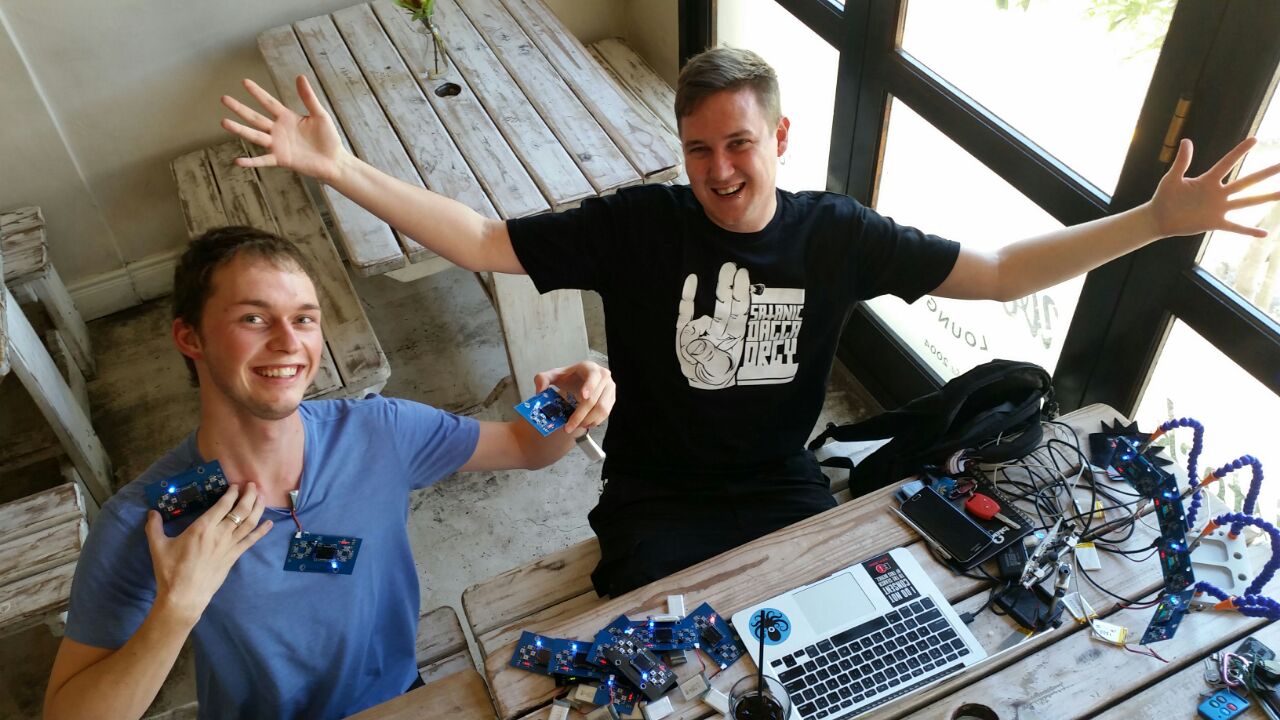
After the fairly successful ZACon badges I did in 2014, the BSides team in Cape Town (where I now live) asked if I’d like to be involved in building another one. Naturally my response was abso-fscking-lutely not. However with a combination of alcohol, begging and offers of whatever we wanted ( mostly from our marvelous sugar pony ) they did manage convince Mike Davis (@ElasticNinja) and myself to do them for 2016. So we set off with a couple of cynical attitudes and some fantastic hangovers to start some brand new badges.
This is a much longer post than normal and one I’ve split into two separate parts, a brief coverage of the hardware and then a longer explanation of the software. If you are just interested in the code, you can head over to https://github.com/AndrewMohawk/BSidesBadge2016
Hardware
Initially I started on the hardware side of the badge in about July ( with the conference in December ), playing with different combinations of hardware I had lying around to see what we could come up with. The basic idea behind what we wanted was:
– Interaction, the badges should communicate with each other
– Thin clients, the badges should offload as much work as possible to a server that allowing further capabilities and ‘updating’ badges
– Show at a minimum the schedule on a screen as well as playing “the game” (more on that later)
– Track interaction between badges ( the game )
– Nothing like the previous badges ( there is no fun in redoing something )
The basic components of the badge looked as follows:
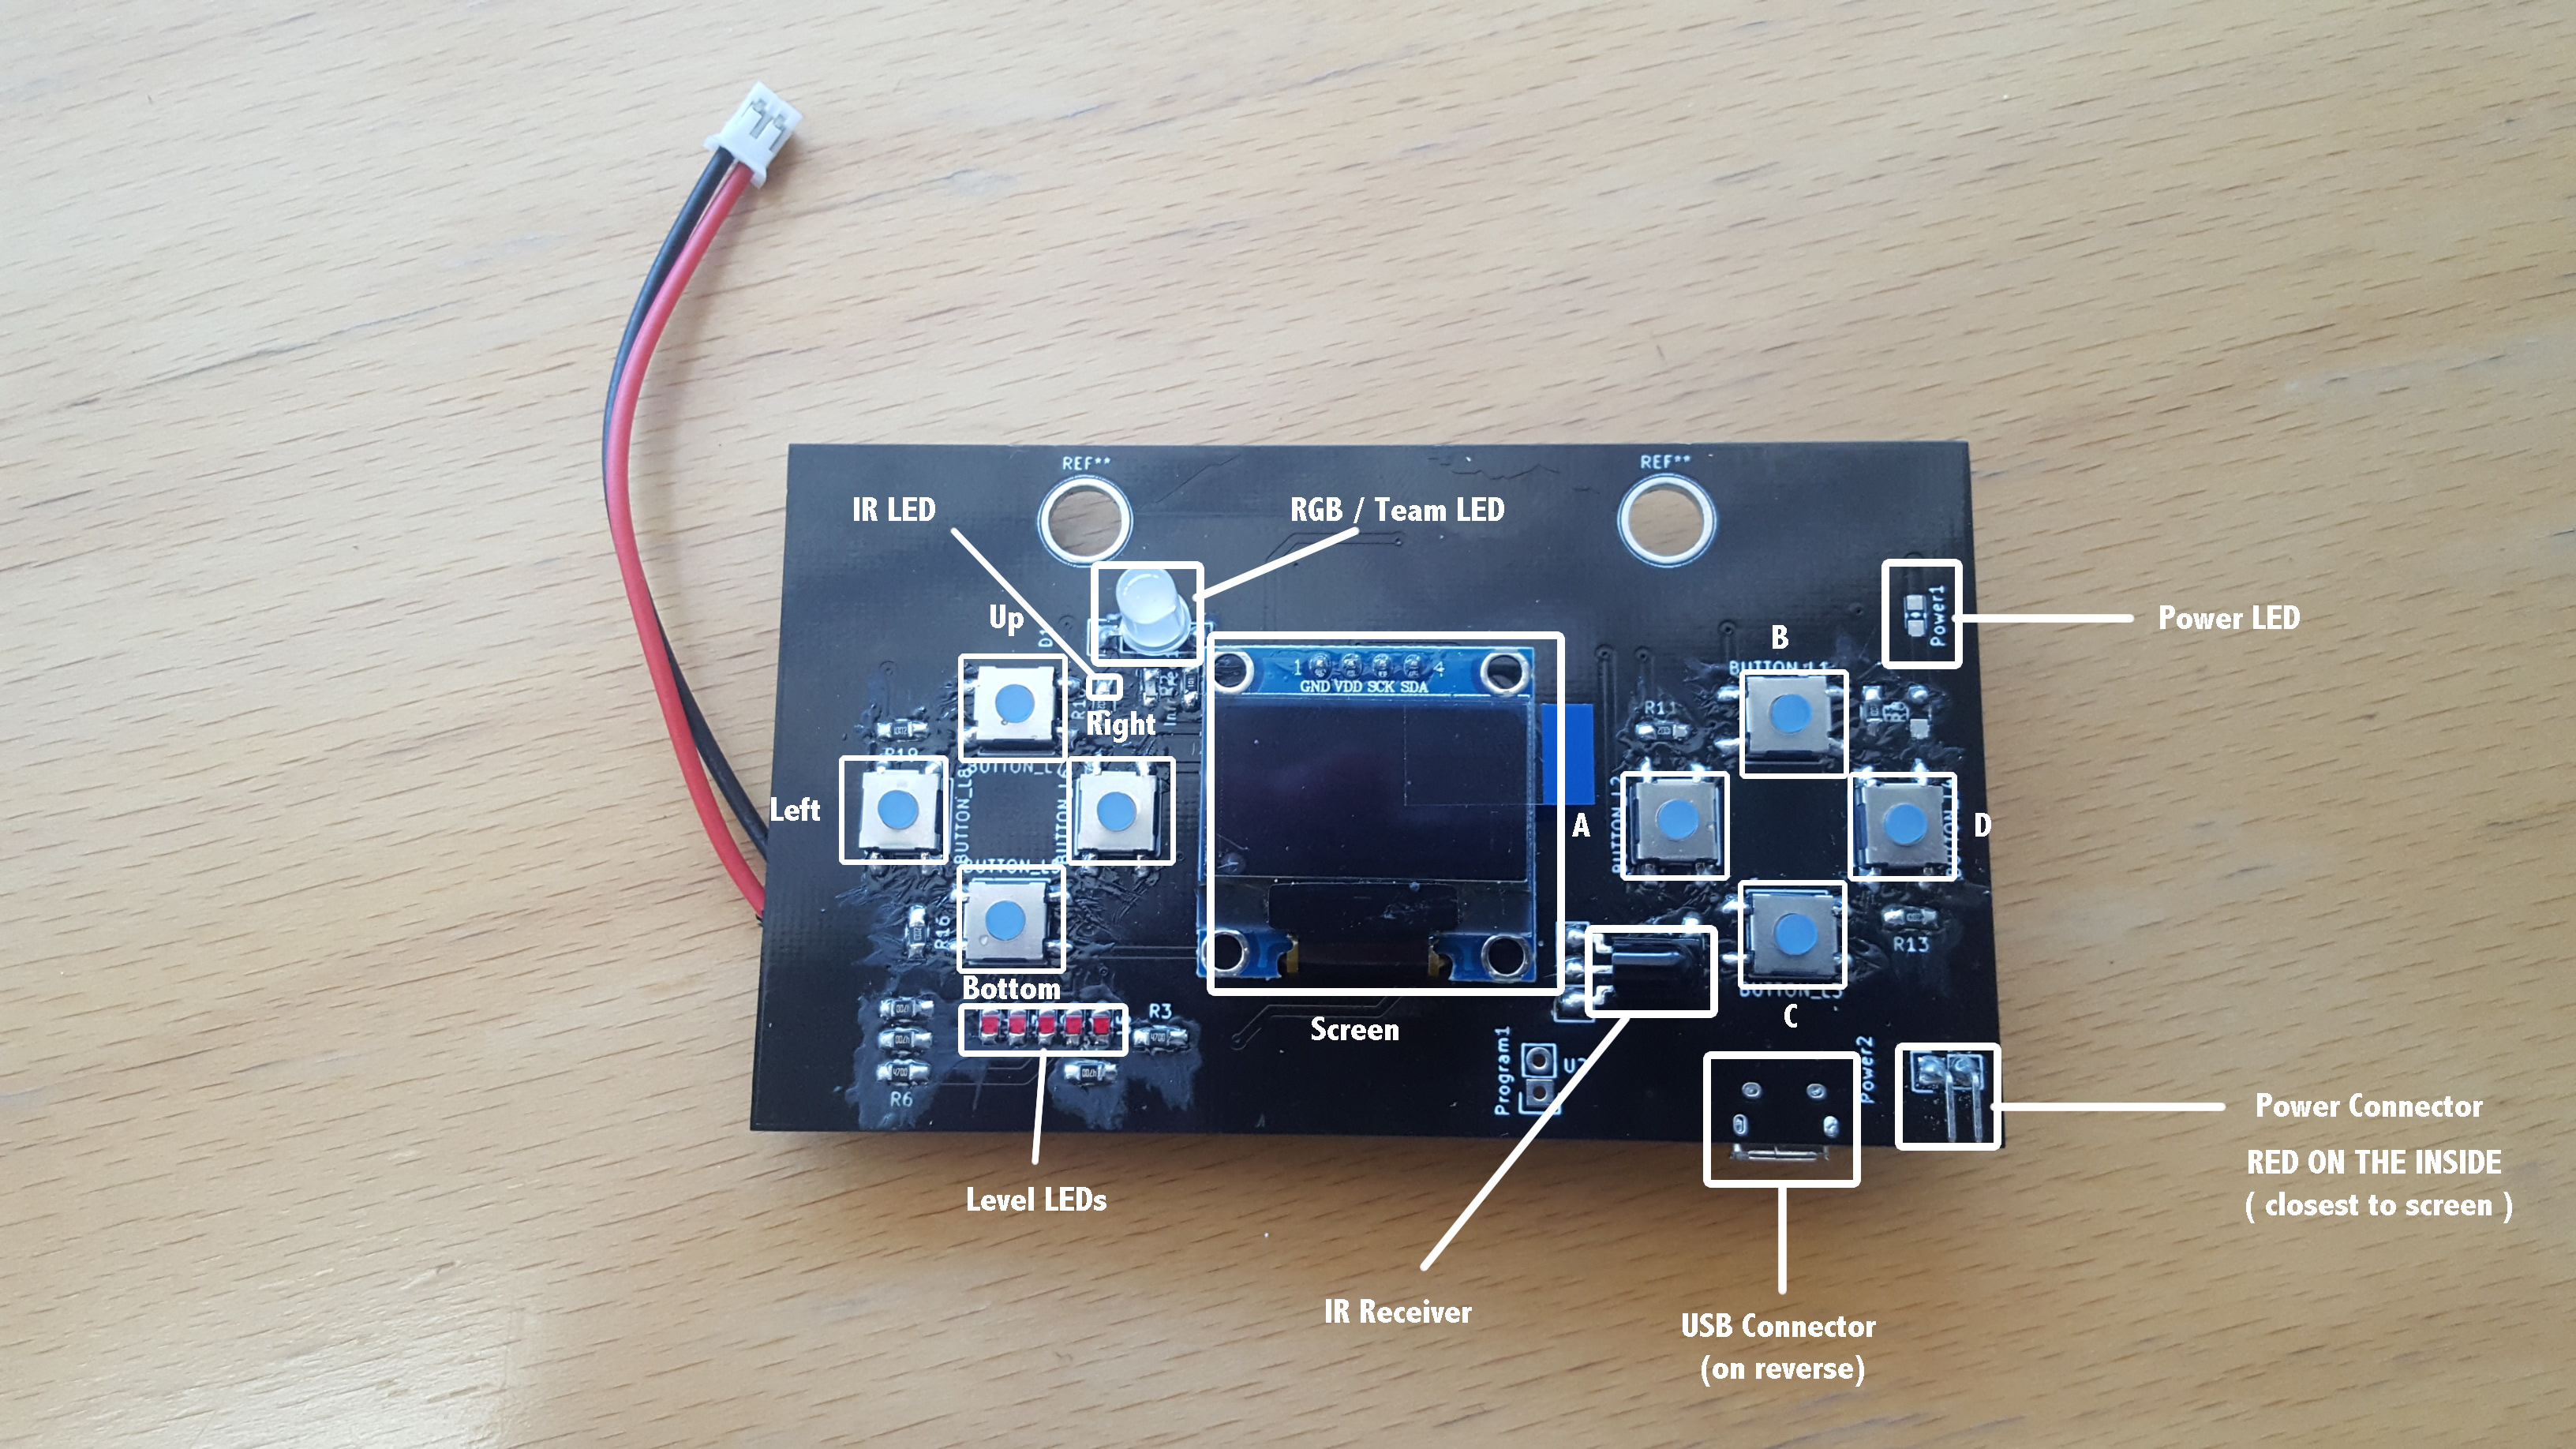
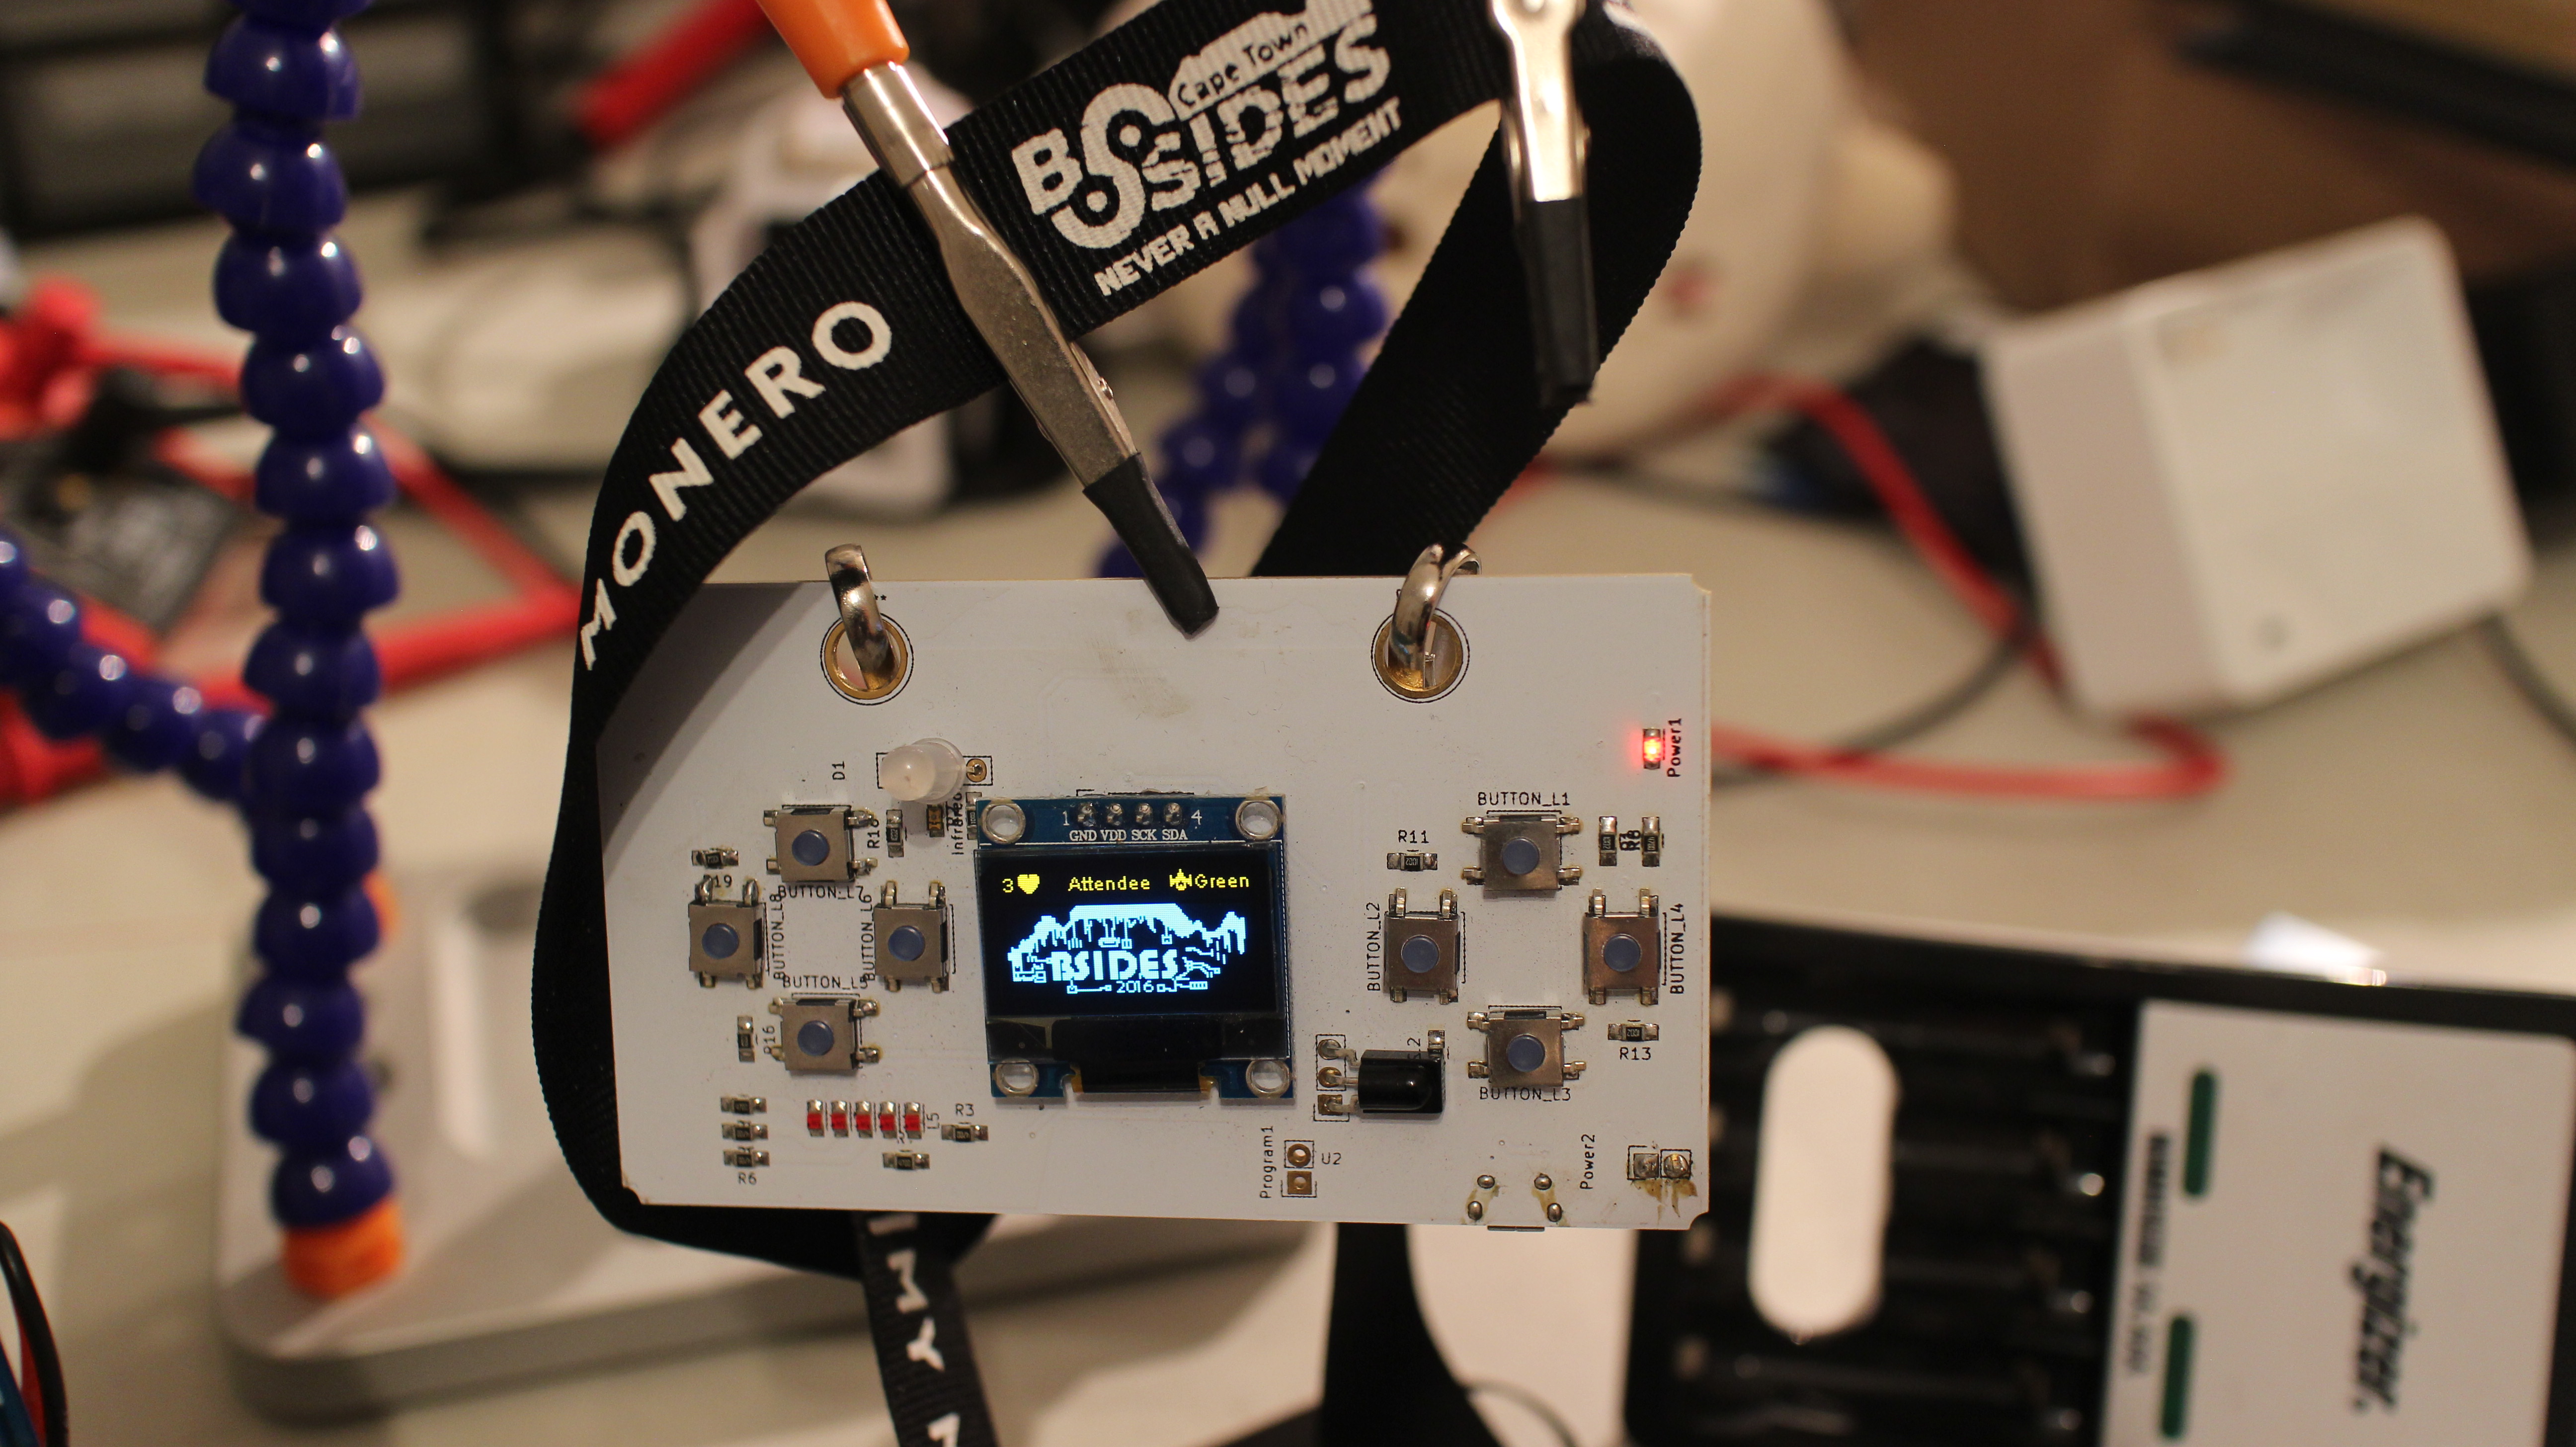
The badge hardware was the following:
– ESP8266
– 128×64 OLED SPI display
– 8 UI Buttons // 1 Reset and 1 Program button (on the rear of the badge)
– IR Receiver and Transmitter
– 5 ‘level’ LEDs + 1 ‘faction’ RGB LED
– 600mah LIPO + charging circuit to charge over USB
There are 3 colours for the badges ( Black / Blue / White) for the various levels of attendees ( Badge Team + Committee / Speaker / Attendee ).
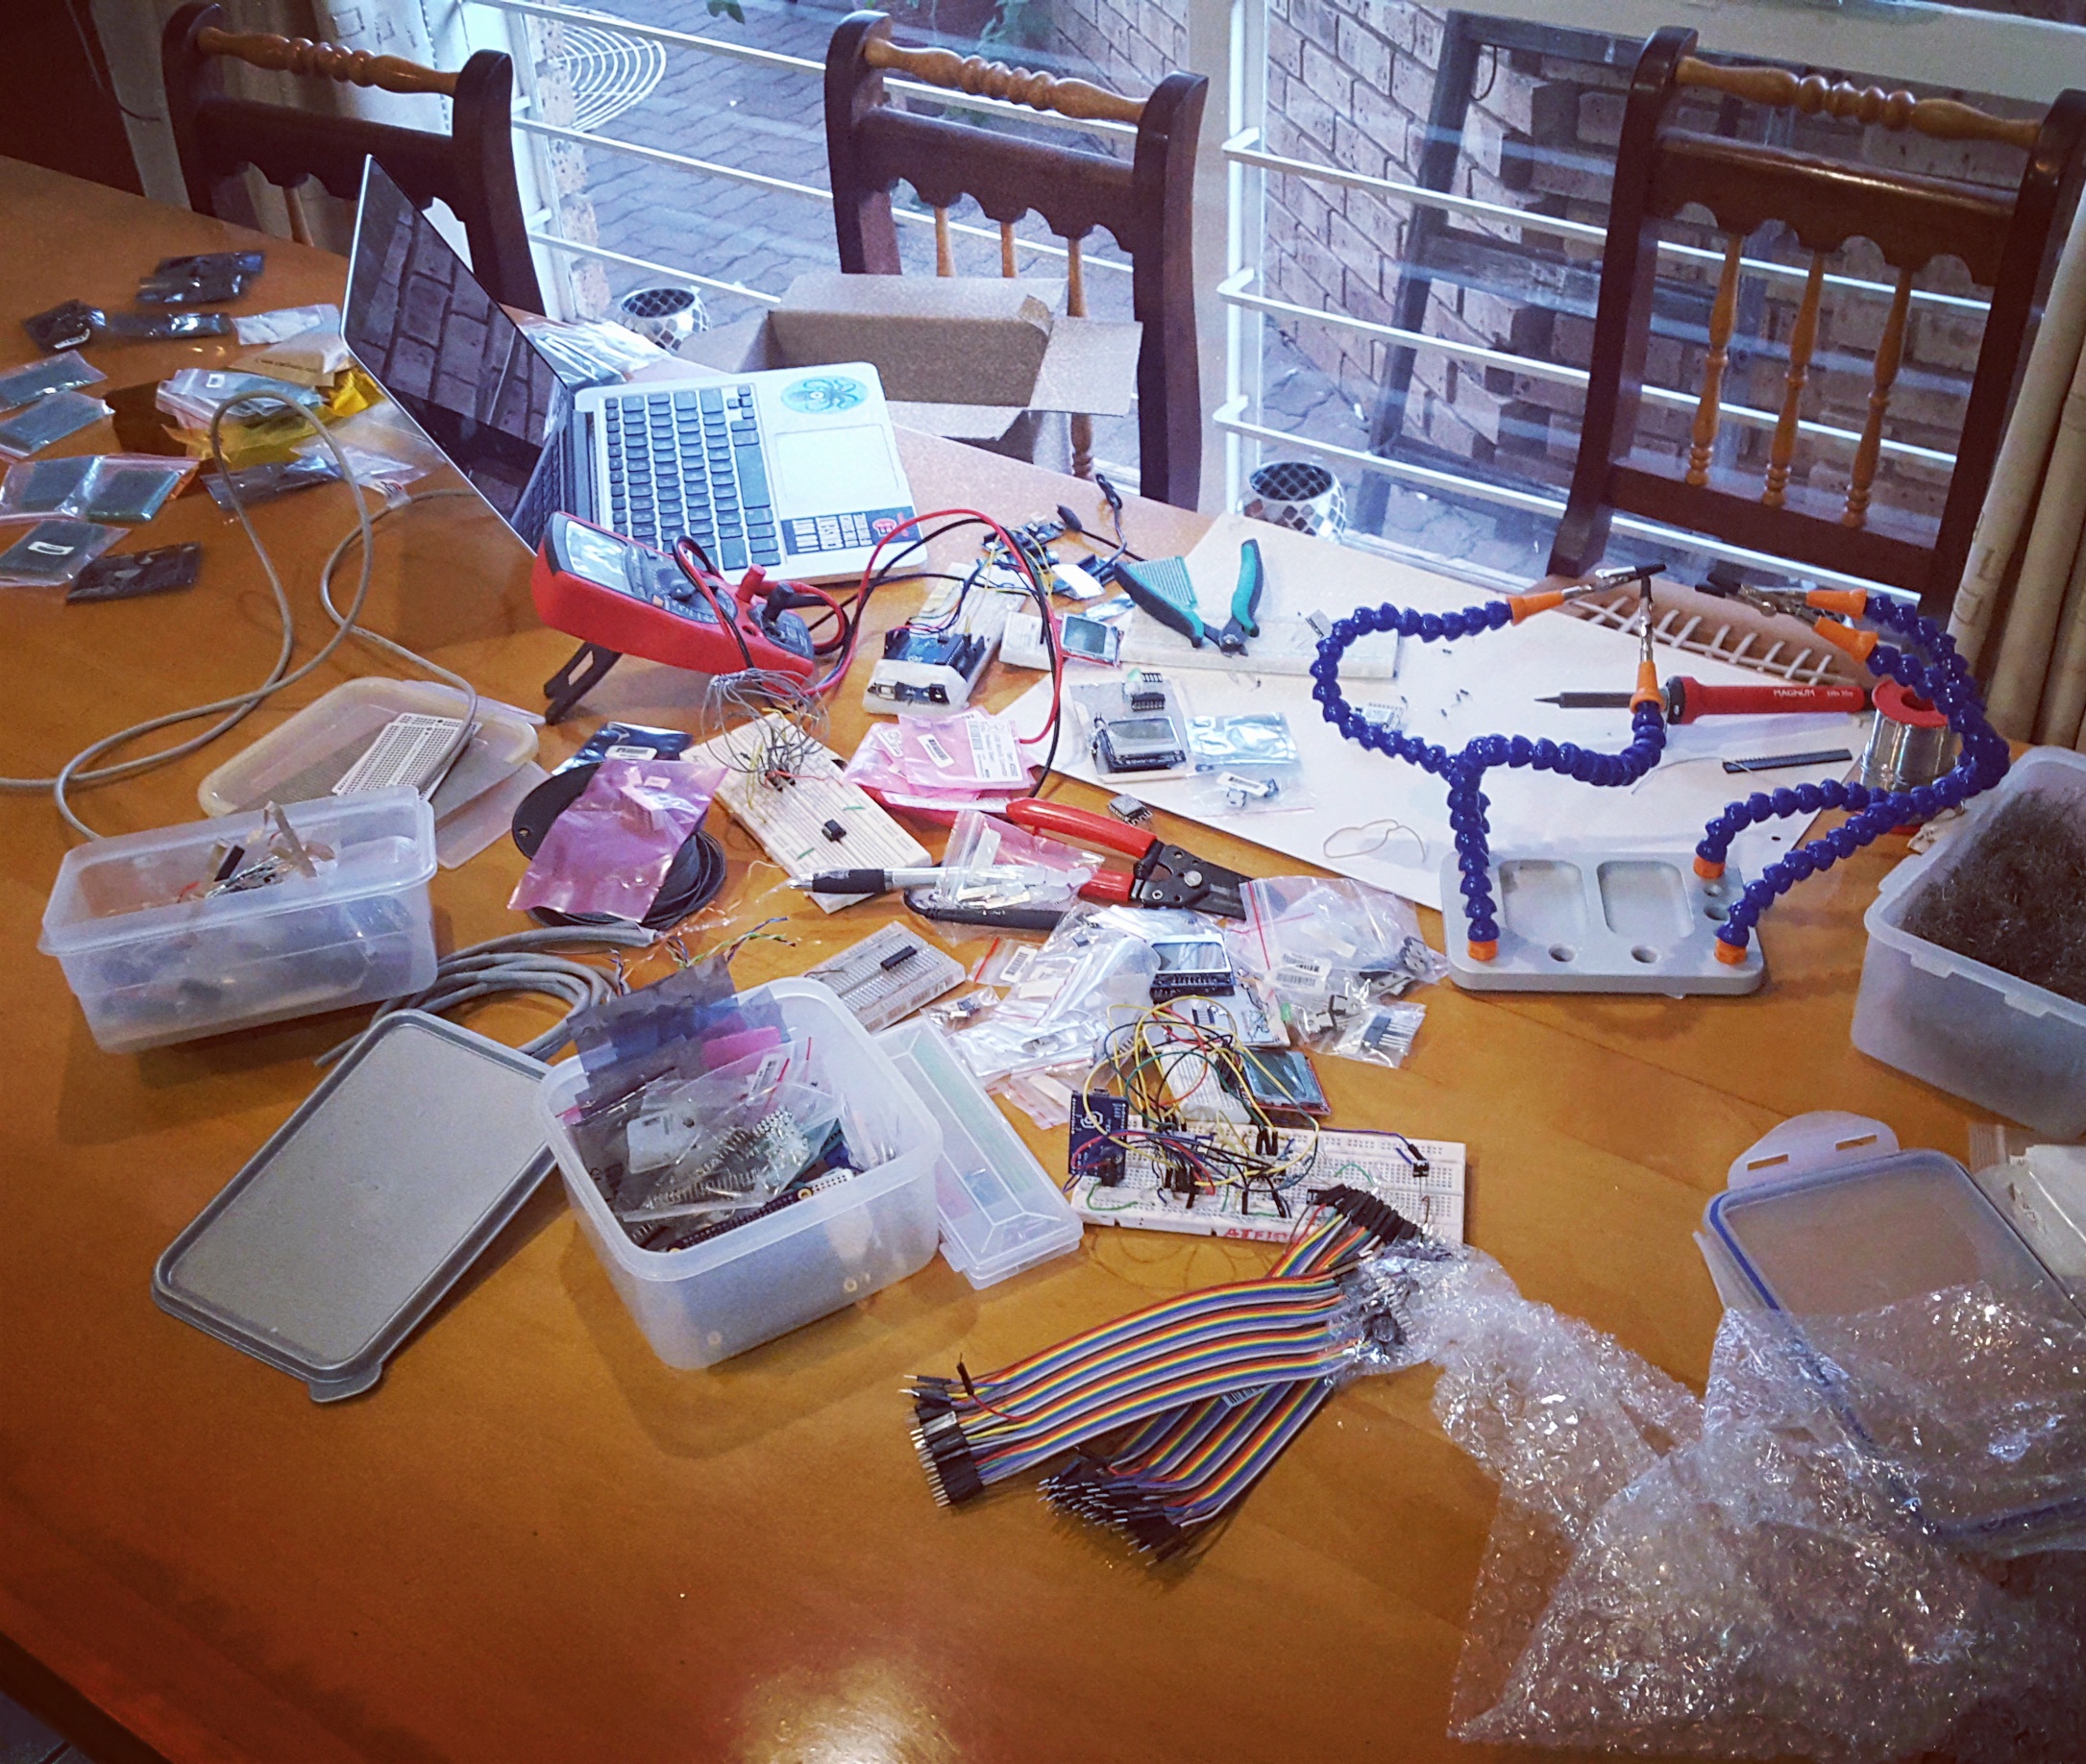
As for the processor we decided to take a look at the ESP8266’s, they offered a very cheap chipset that could run simple(ish) Arduino/C applications as well as give us the ability to connect to WiFi ( so we could offload work and communications ). Loads of fun was had trying to solder these devices, and I still have a number of tentacled monsters sitting around my little flat:


ProTip: After a few attempts the easiest way for me to solder them became threading resistors through either side of the ESP to have the ‘legs’ pointing down, soldering them in place and then removing the actual resistor part. This meant I could easily use them on a breadboard.
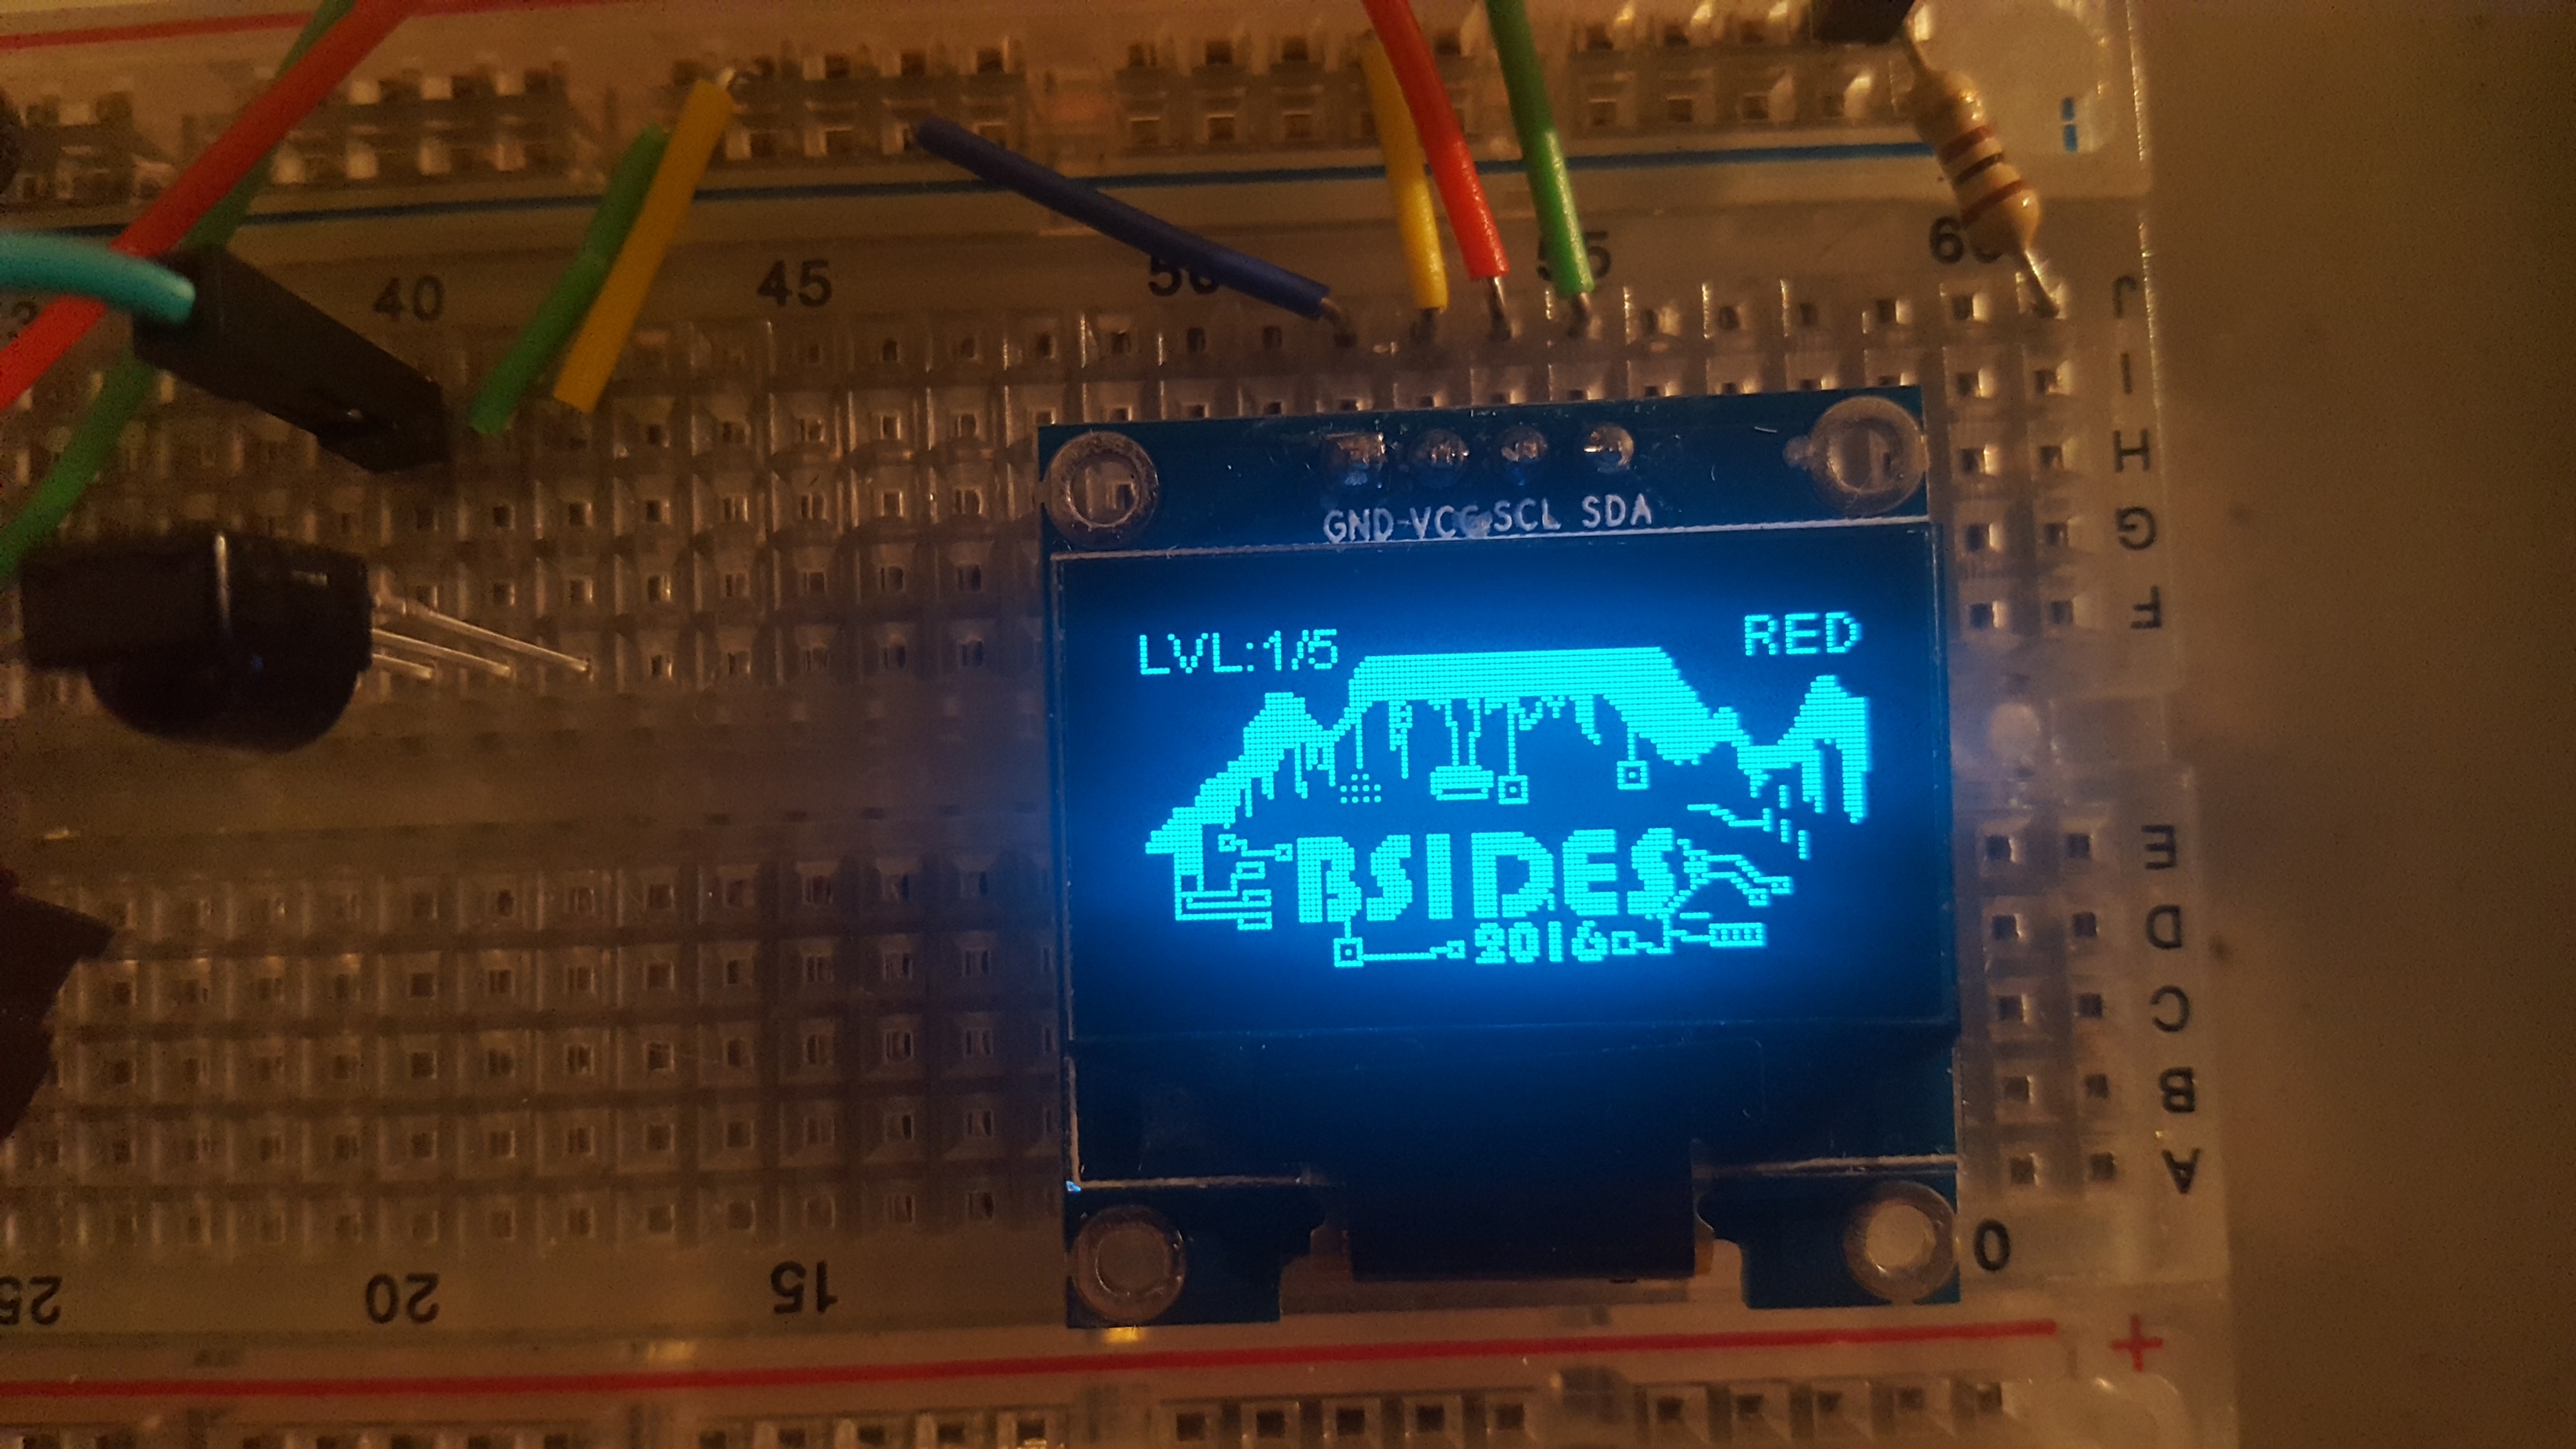
Since I still had a number of screens lying around, initially I decided to revert back to the 5110 LCD screens:


Naturally I tormented Mike (@ElasticNinja ) by sending different updates to the boards as I did them in fritzing so that he could create the hardware design every time. The 5110 screens actually turned out less impressive than what I first thought and recalling the nightmare of them popping for even the slightest inconvenient voltage or heat wave was keeping me up at night.
When I went round to communica/RS/netram/etc to look for a few items I needed for prototypes I stumbled upon these amazing OLED 128×64 SPI screens. As they were SPI it meant we used less pins than the 5110 as well as have a slightly higher resolution, pins really counted as we ended up using every available pin on the ESP8266-12!
Next up was communication. Deciding we wanted close range communication to track badges meant that we could opt for cheap Infrared receivers and transmitters, the range on them was about 45cm which was perfect for monitoring communication between individuals wearing the badges. Also with WiFi being available it meant I could now make an HTTP request to a server to send updates about which other badges a particular badge had seen as well as receive any updates for the badge. Infrared also meant the ability to refactor your badge to allow it to be a WiFi remote or TV-B-Gone ;)
Naturally we needed some blinkenlights or it wouldnt be a real badge. After our various game ideas we went with a single RGB LED and 5 ‘level’ RGB’s that can be used to describe each badges status. I’ll talk more about this in the software section of this post!
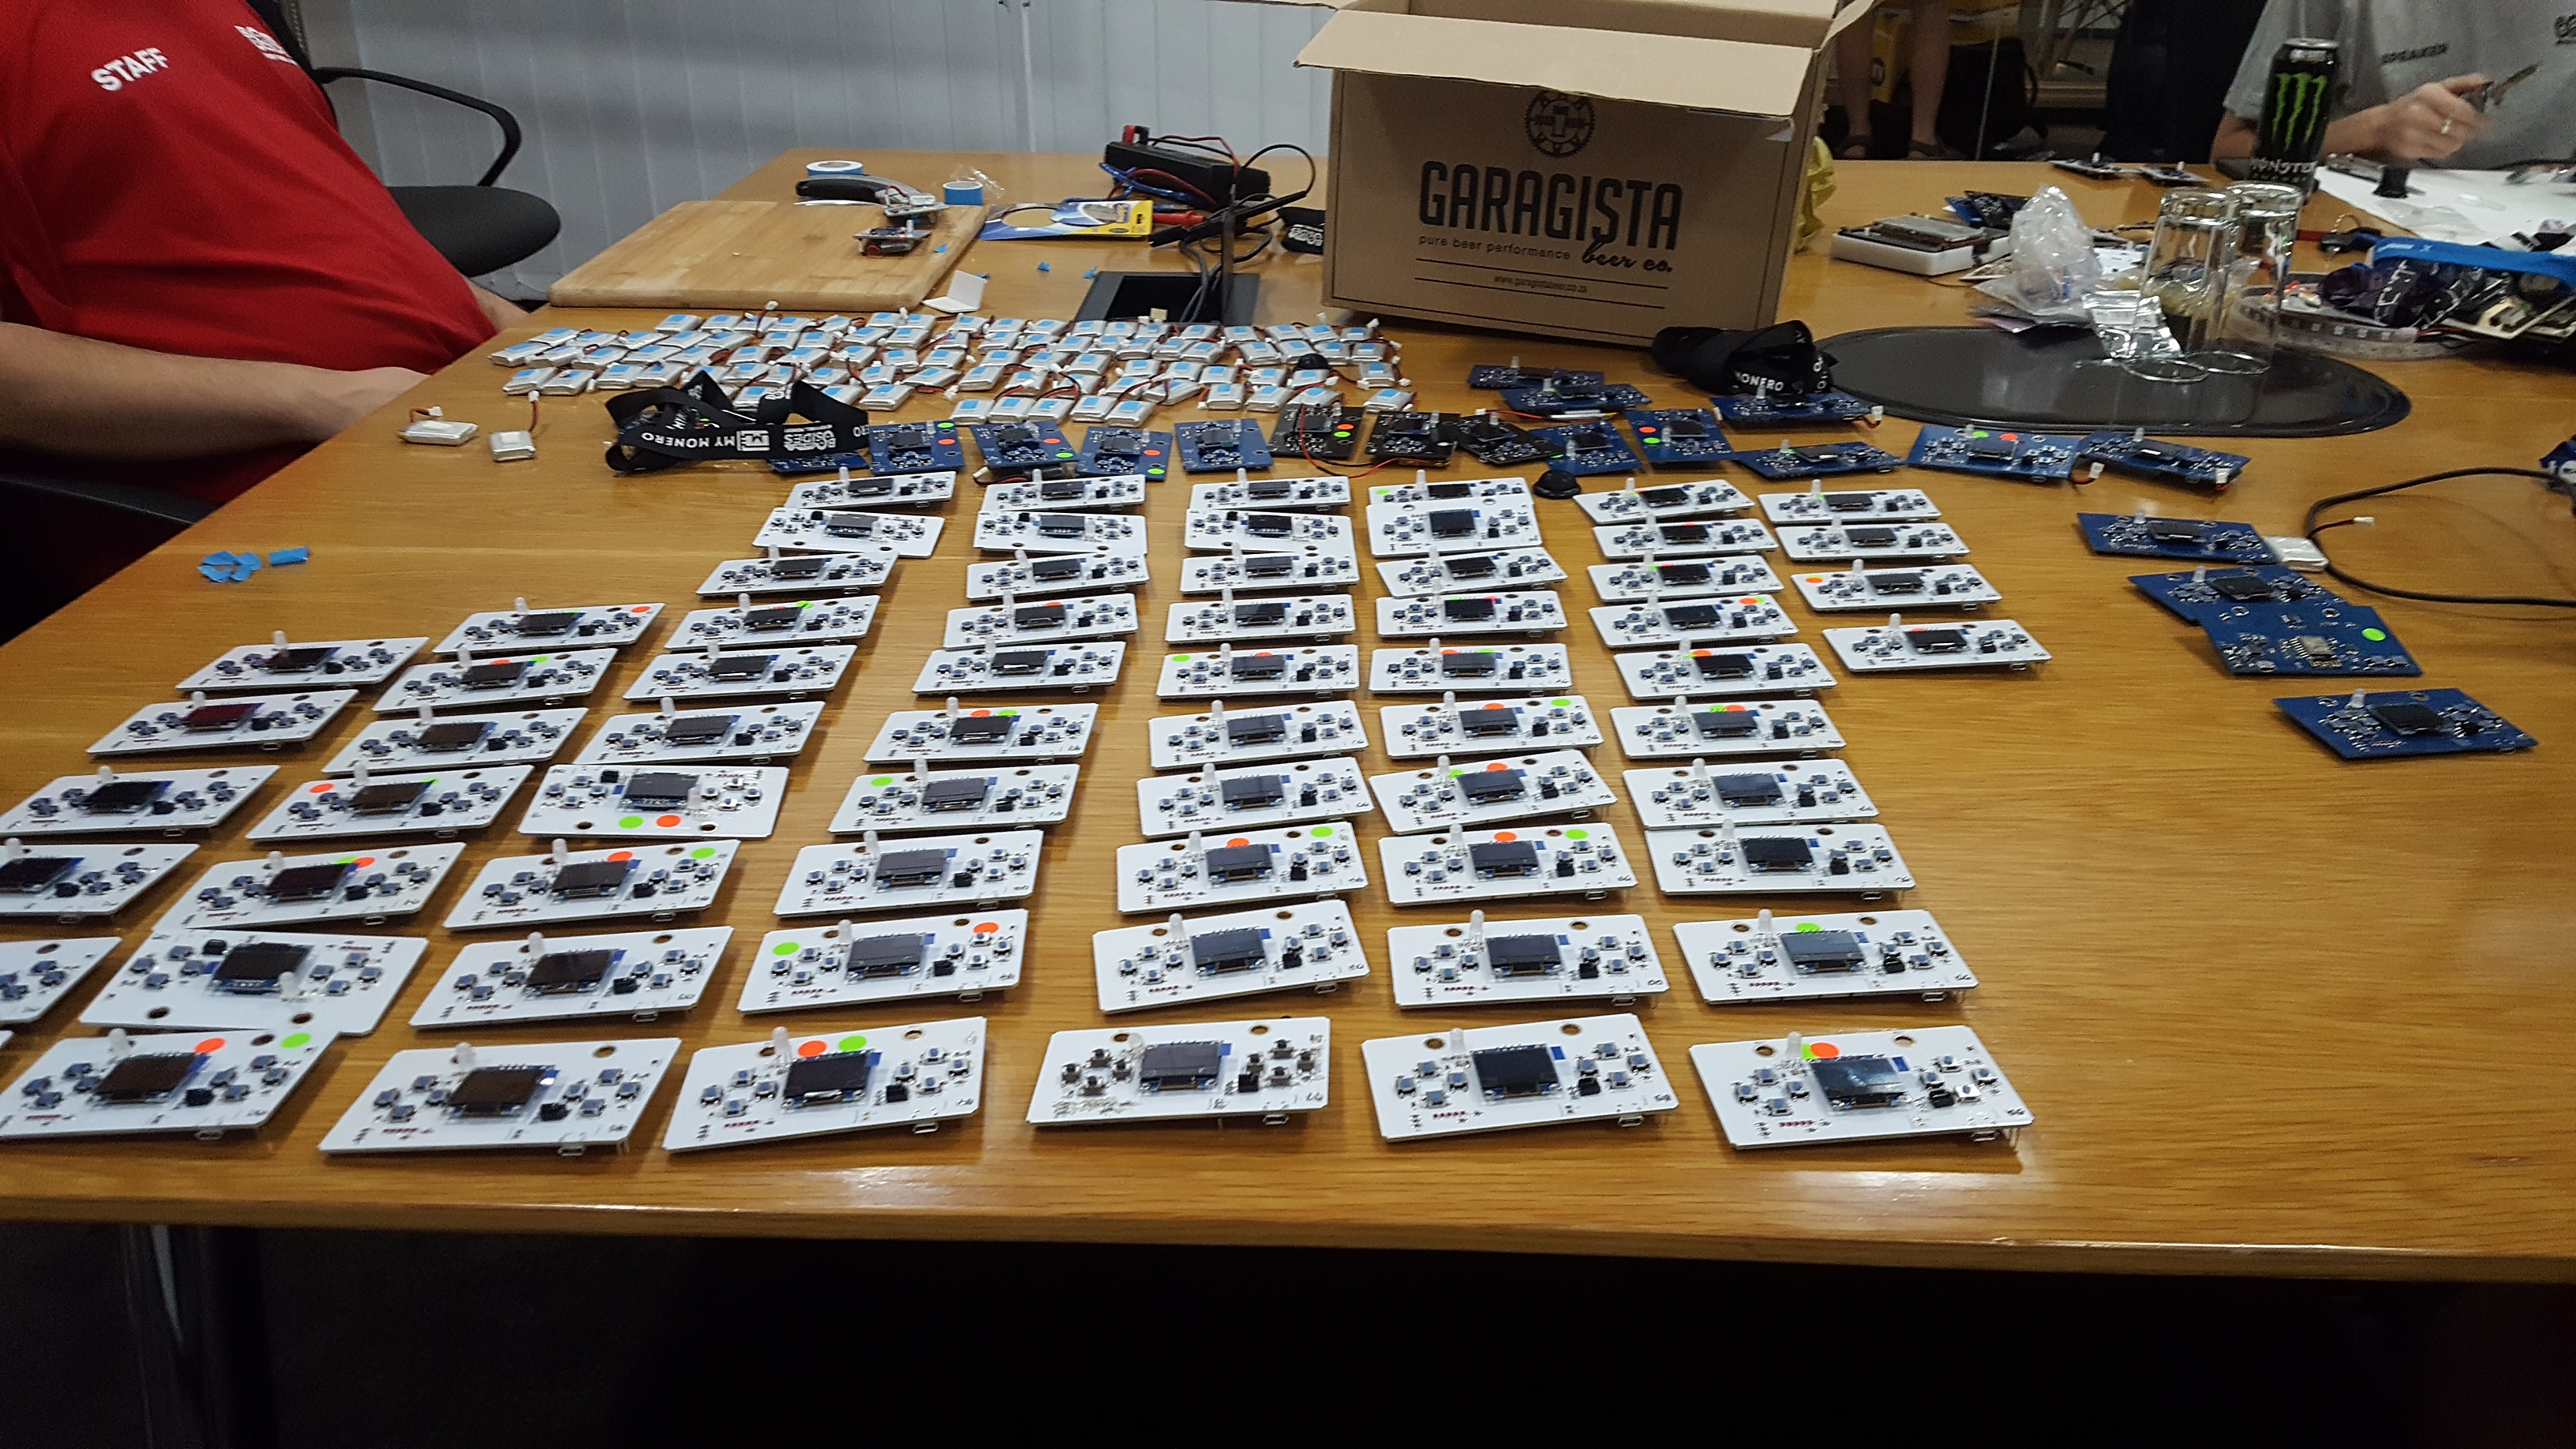
We spent a good amount of time on the hardware for the badges, tweaking, trying to use all the features, and in the end our hardware design came out from the following
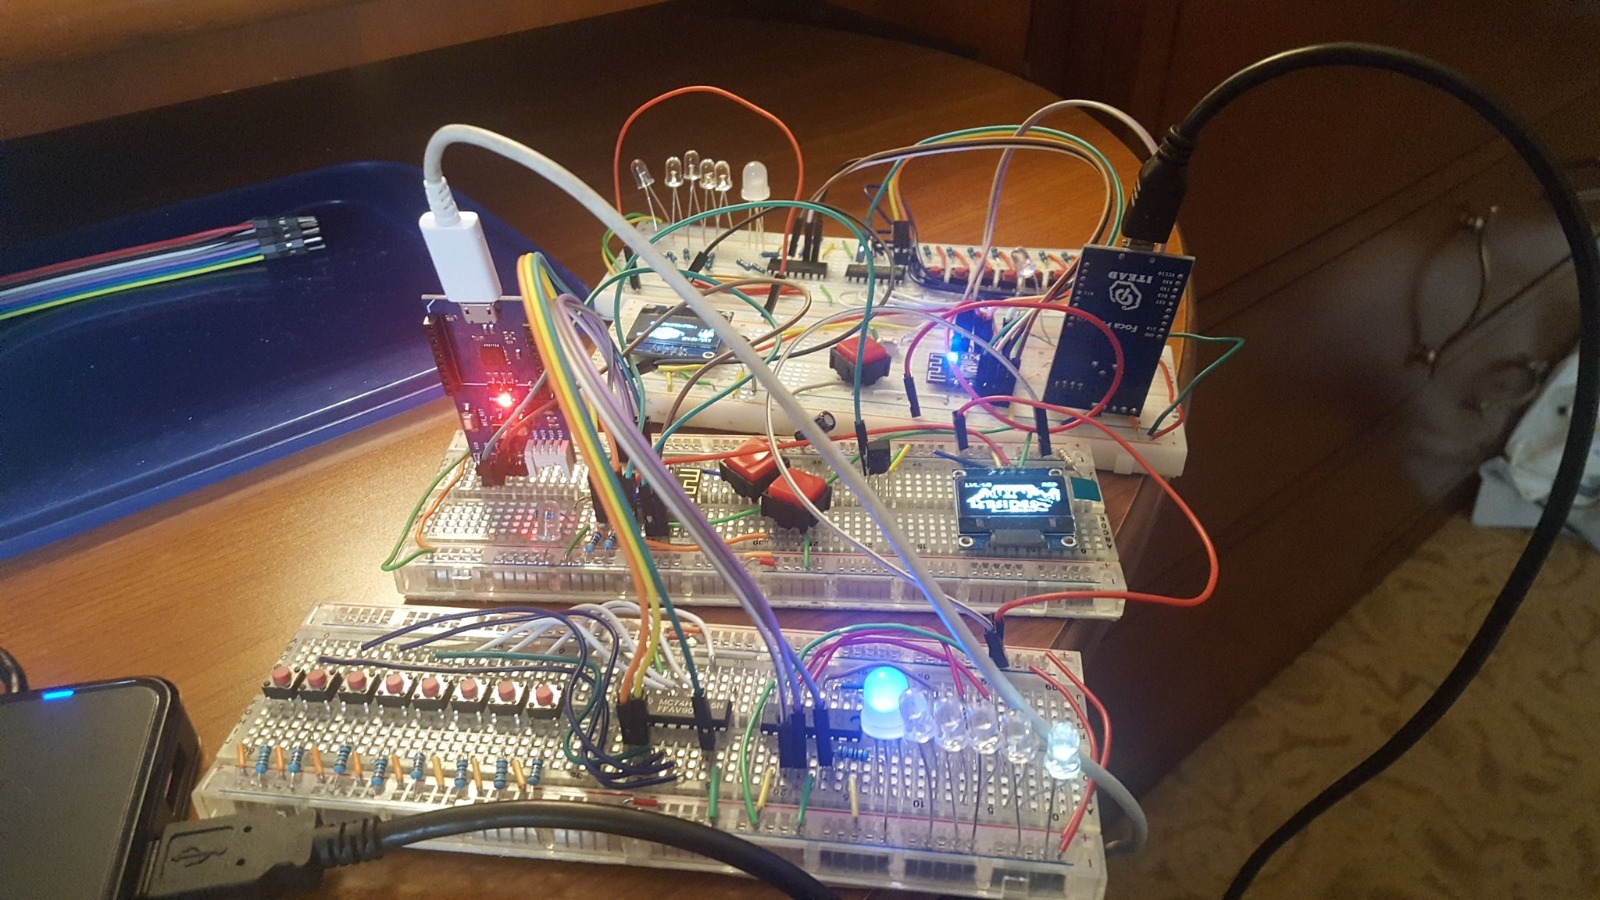
With the help of a number of people, especially @shifttymike who really pulled through for us in the end fixing a vast majority of shift registers (and thus acquiring a new nickname):
To some pretty nice badges:
Mike will (I hope) do a full writeup on the badge hardware with some further detail including all the joys of getting our LiPo’s to be rechargable!
Mike even had some clever frames for the badges built for a few of the team, including my mohawk’d badge:

Software
Where the previous years badges focused more on the hardware side of it, this year they were designed around an idea of the game. We wanted to build an organic game that we could use to show the interactions between all the badges in real time. The game (yes, you just lost), was just one of the pieces we wanted the badges to do, we also had challenges whereby third party individuals could build a challenge that needed to be solved and upon solving it unlocked some functionality that was hidden on the badge. The badges also showed the schedule, game stats, the amount of challenges completed, an about screen and a few others.
Here is a quick walkthrough of the badge from a few working models:
Network
As far as I am aware no one MiTM’d or spoofed request from the badges, but they worked in a relatively simple way where for every request made a badge would first make a request for a hash and would get returned one of a number of strings (you can see them in the loyalty game example below). Once the badge had this hash it would then look at the length of hash string and do a simple caeser cipher / shift cipher of that length. Security through obscurity and all that. The badges intentionally ran over HTTP rather than HTTPS to allow people to look at these requests and fuzz if needed.
The game
The game worked whereby everyone would initially start with a random team (Teams were one of the 3, indicated by either red/green/blue) and start at level 1. The badges would then naturally interact as people hung out in groups and try and “convert” each other with the following ruleset:
1. Badges receive a random faction/team and a level of 1 when they join the network for the first time
2. Badges interact with other badges via Infrared
3. Badges then make HTTP “encrypted” request to the server to tell the server what badges it has interacted with
4. The server then uses the following “loyalty” algorithm (the one I felt most confident would work compared to the others after testing):
1. If a badge interacts with a badge that has a different level and different team/faction to it, the badge with the highest level will convert the badge with the lower level to its faction/team and the badge that had the higher level will drop a level
2. If two badges interact that are on different teams/factions and the same level there is a 50/50 chance on converting the opposing badge
3. If two badges interact that are in the same team/faction there is a 1 in (10 * current level) that the badge will defect to another team
4. If two badges interact that are in the same team/faction there is a 1 in 15 chance that one of them will gain an additional level aka becoming more “loyal”
5. Badges receive back a message indicating their current level as well as faction
For example if 4 people got randomly assigned ‘green’ faction, they could all go and talk to a person who was in the ‘red’ faction and likely convert them over to green just by standing near them as well as if they were all ‘green’ they could level each other up so that their chances of converting people to their team was higher!
Here is an example of me adding 100 badges and then doing 3 rounds of 100 badges randomly interacting with other badges to show the levels:
And here is a quick example of a Green Level 4 badge using the above algorithm to convert a Blue Level 2 badge:
This model worked fairly well in testing, at least better than any of the other models I attempted, but naturally was terrifying fixing it to this as this no way could truly map human interactions. Based on the models I tried the defecting was the most important part to keep the states fairly even otherwise as soon as one faction/team received critical mass it steam rolled the rest of the game!
We ended up spending a lot of time tweaking to the variables in it to get it mostly working. It meant that we might end up with a wholly unbalanced game that was over within the first hour of the conference!
The results of “the game” (again, you lost.) :
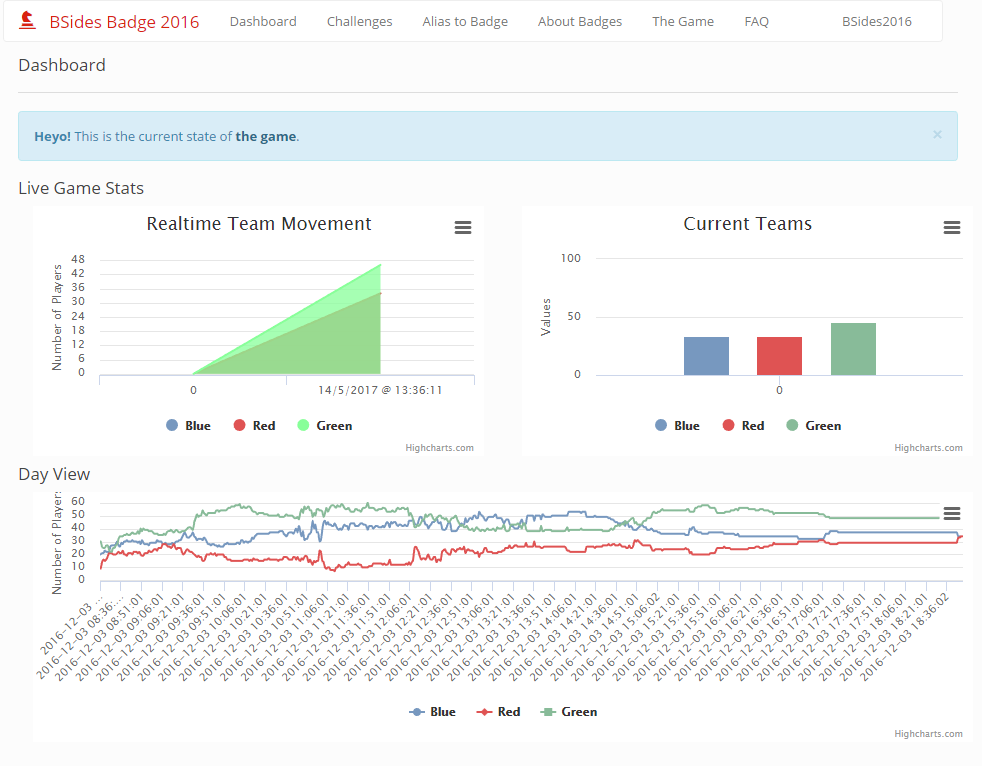
The results were fairly decent and I think overall it worked pretty well (the majority of people trying to ‘game’ it were green). We had about 120 players at peak times and ended the game at 110. The player amounts changed as people moved in and out of the conference.
Badge Interface
Now onto the design/UI of the badges. The screen/UI elements were based around the fantastic oled ssd1306 library: https://github.com/squix78/esp8266-oled-ssd1306, this library helped with the animations as well as a number of positional layouts and frames for the badges. As for the images I made them in Adobe Fireworks by hand and then converted them to XBM, you can see a selection of them at https://github.com/AndrewMohawk/BSidesBadge2016/tree/master/8bit

![]()
![]()


![]()
![]()
![]()
Startup
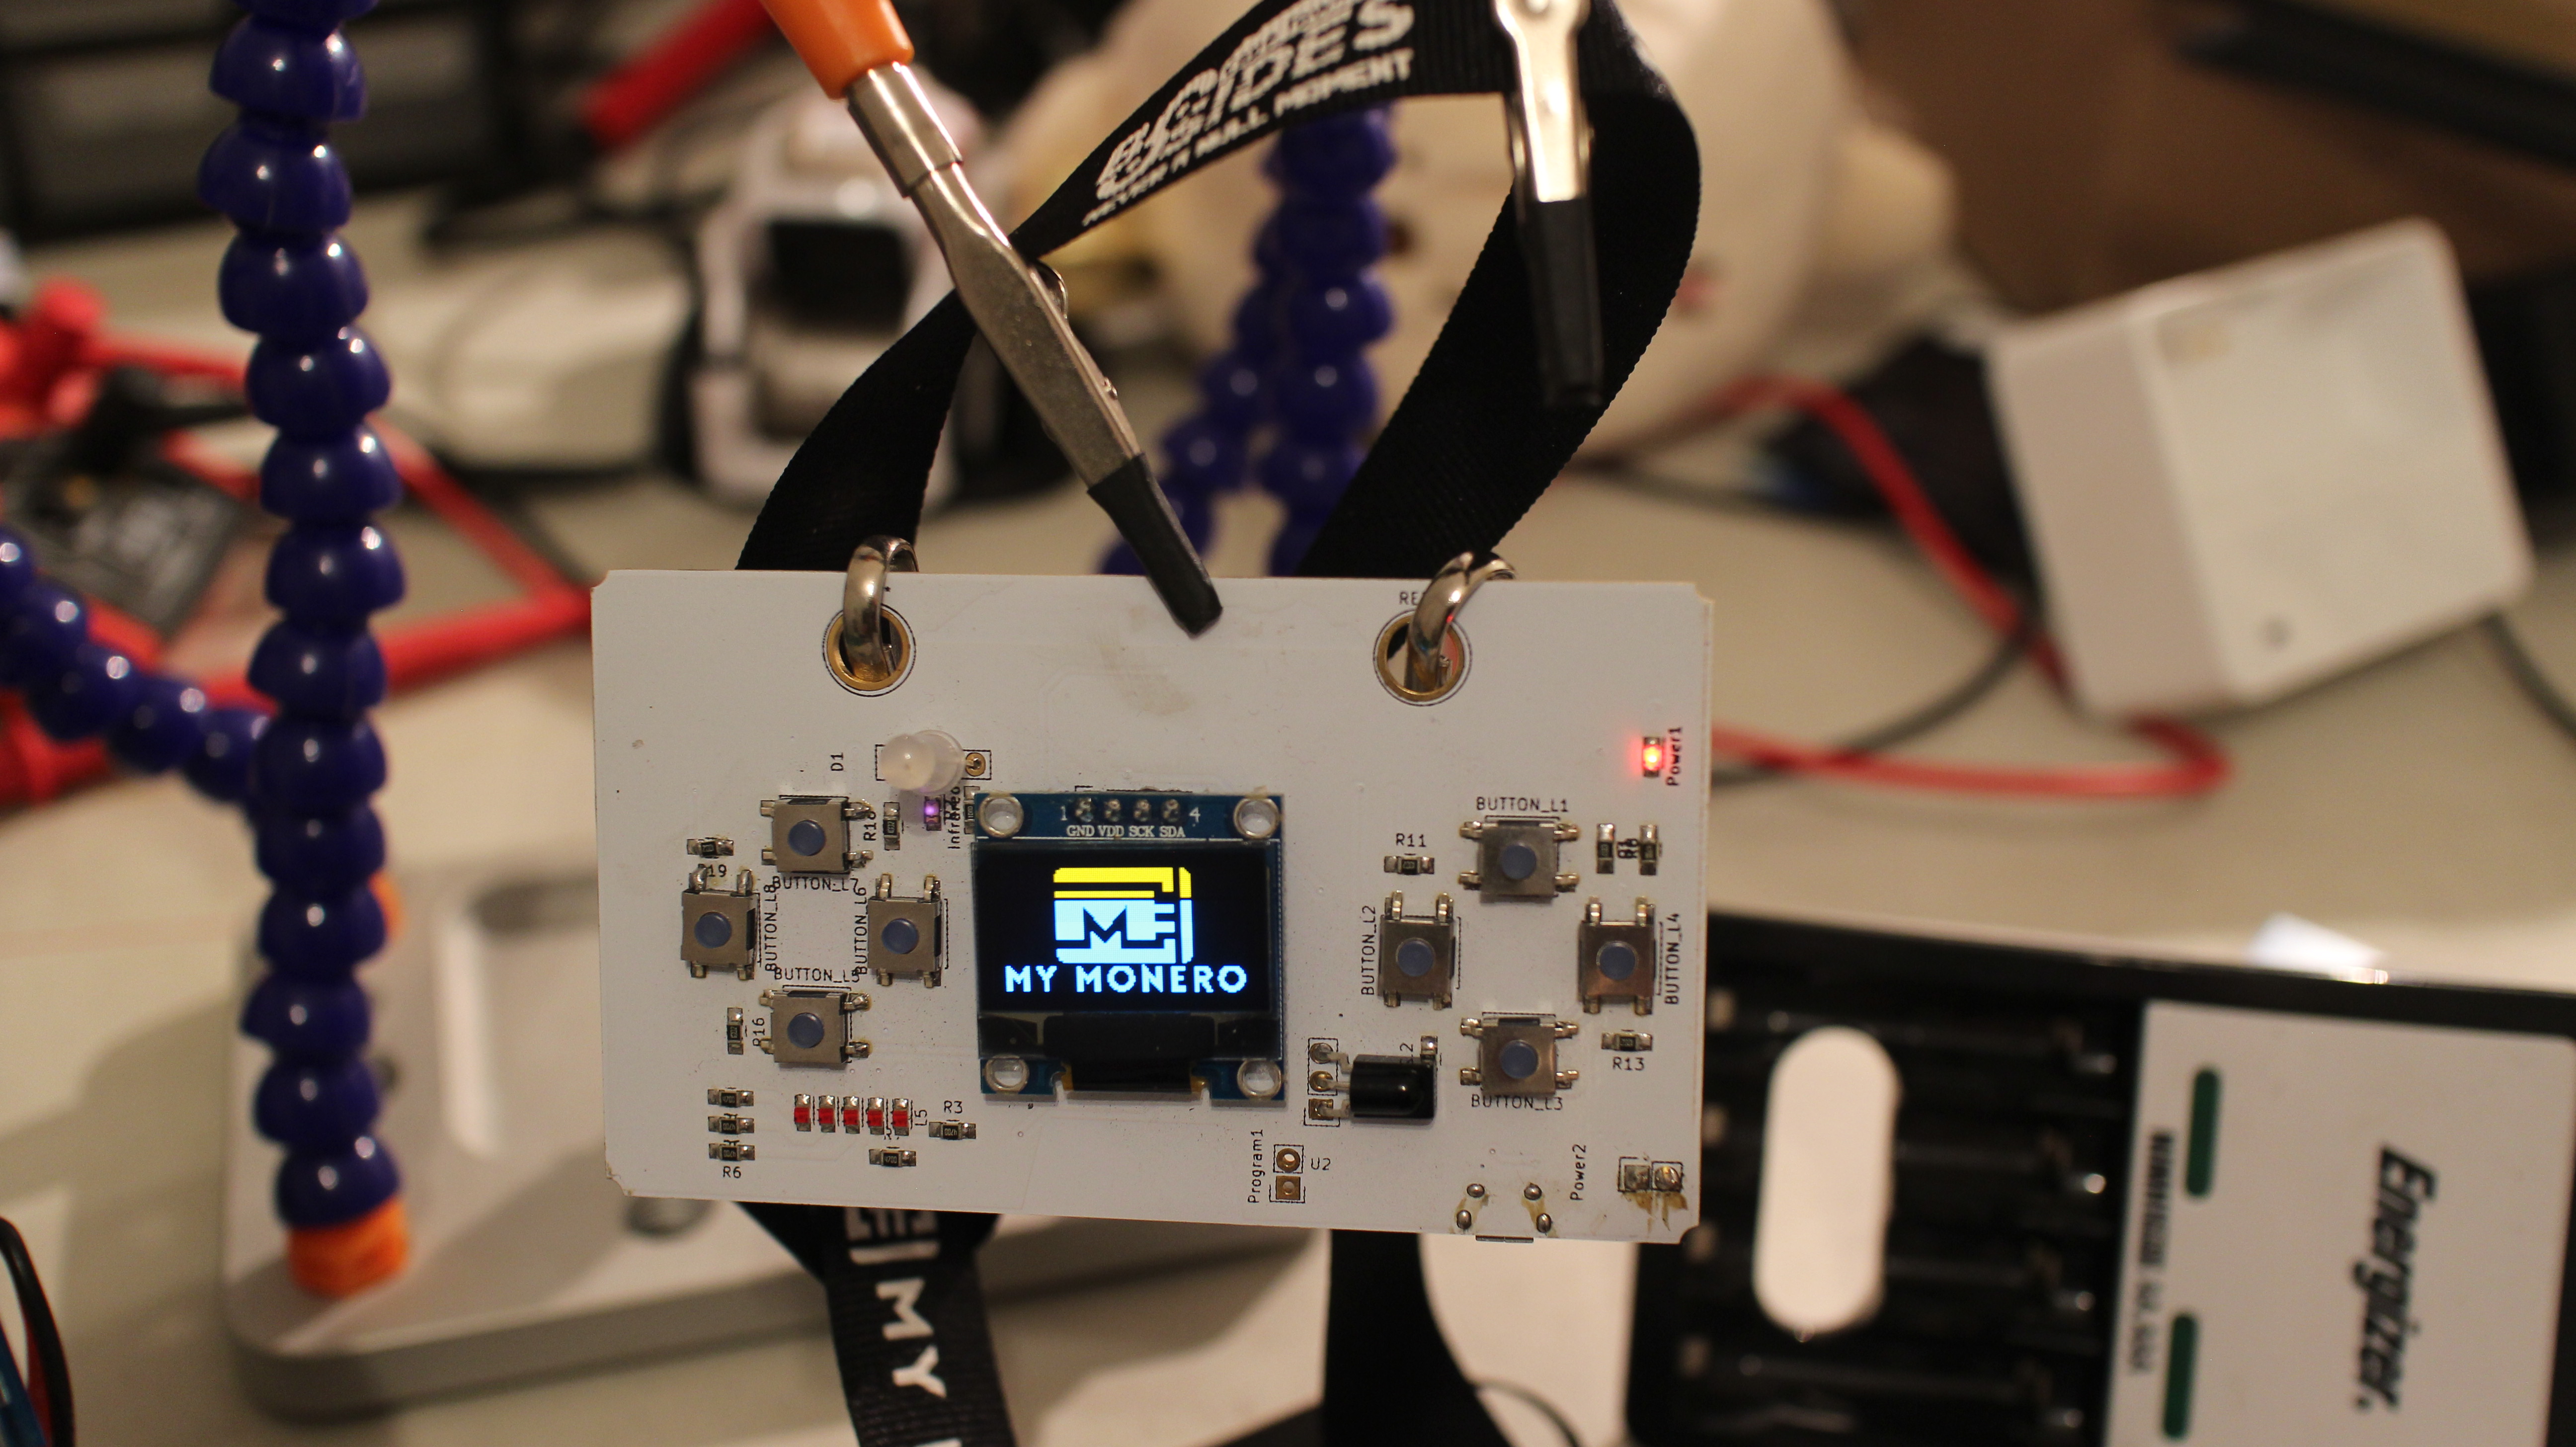
The badge startup is a series of animations that show the sponsor (MyMonero) as well as some cheesy animations (you can see this in the previous walkthrough video):
Screens
The badges contained 6 base screens that the users could navigate as well as a sleep state where the screen displayed a sleeping panda, these were as follows:
Logo Screen
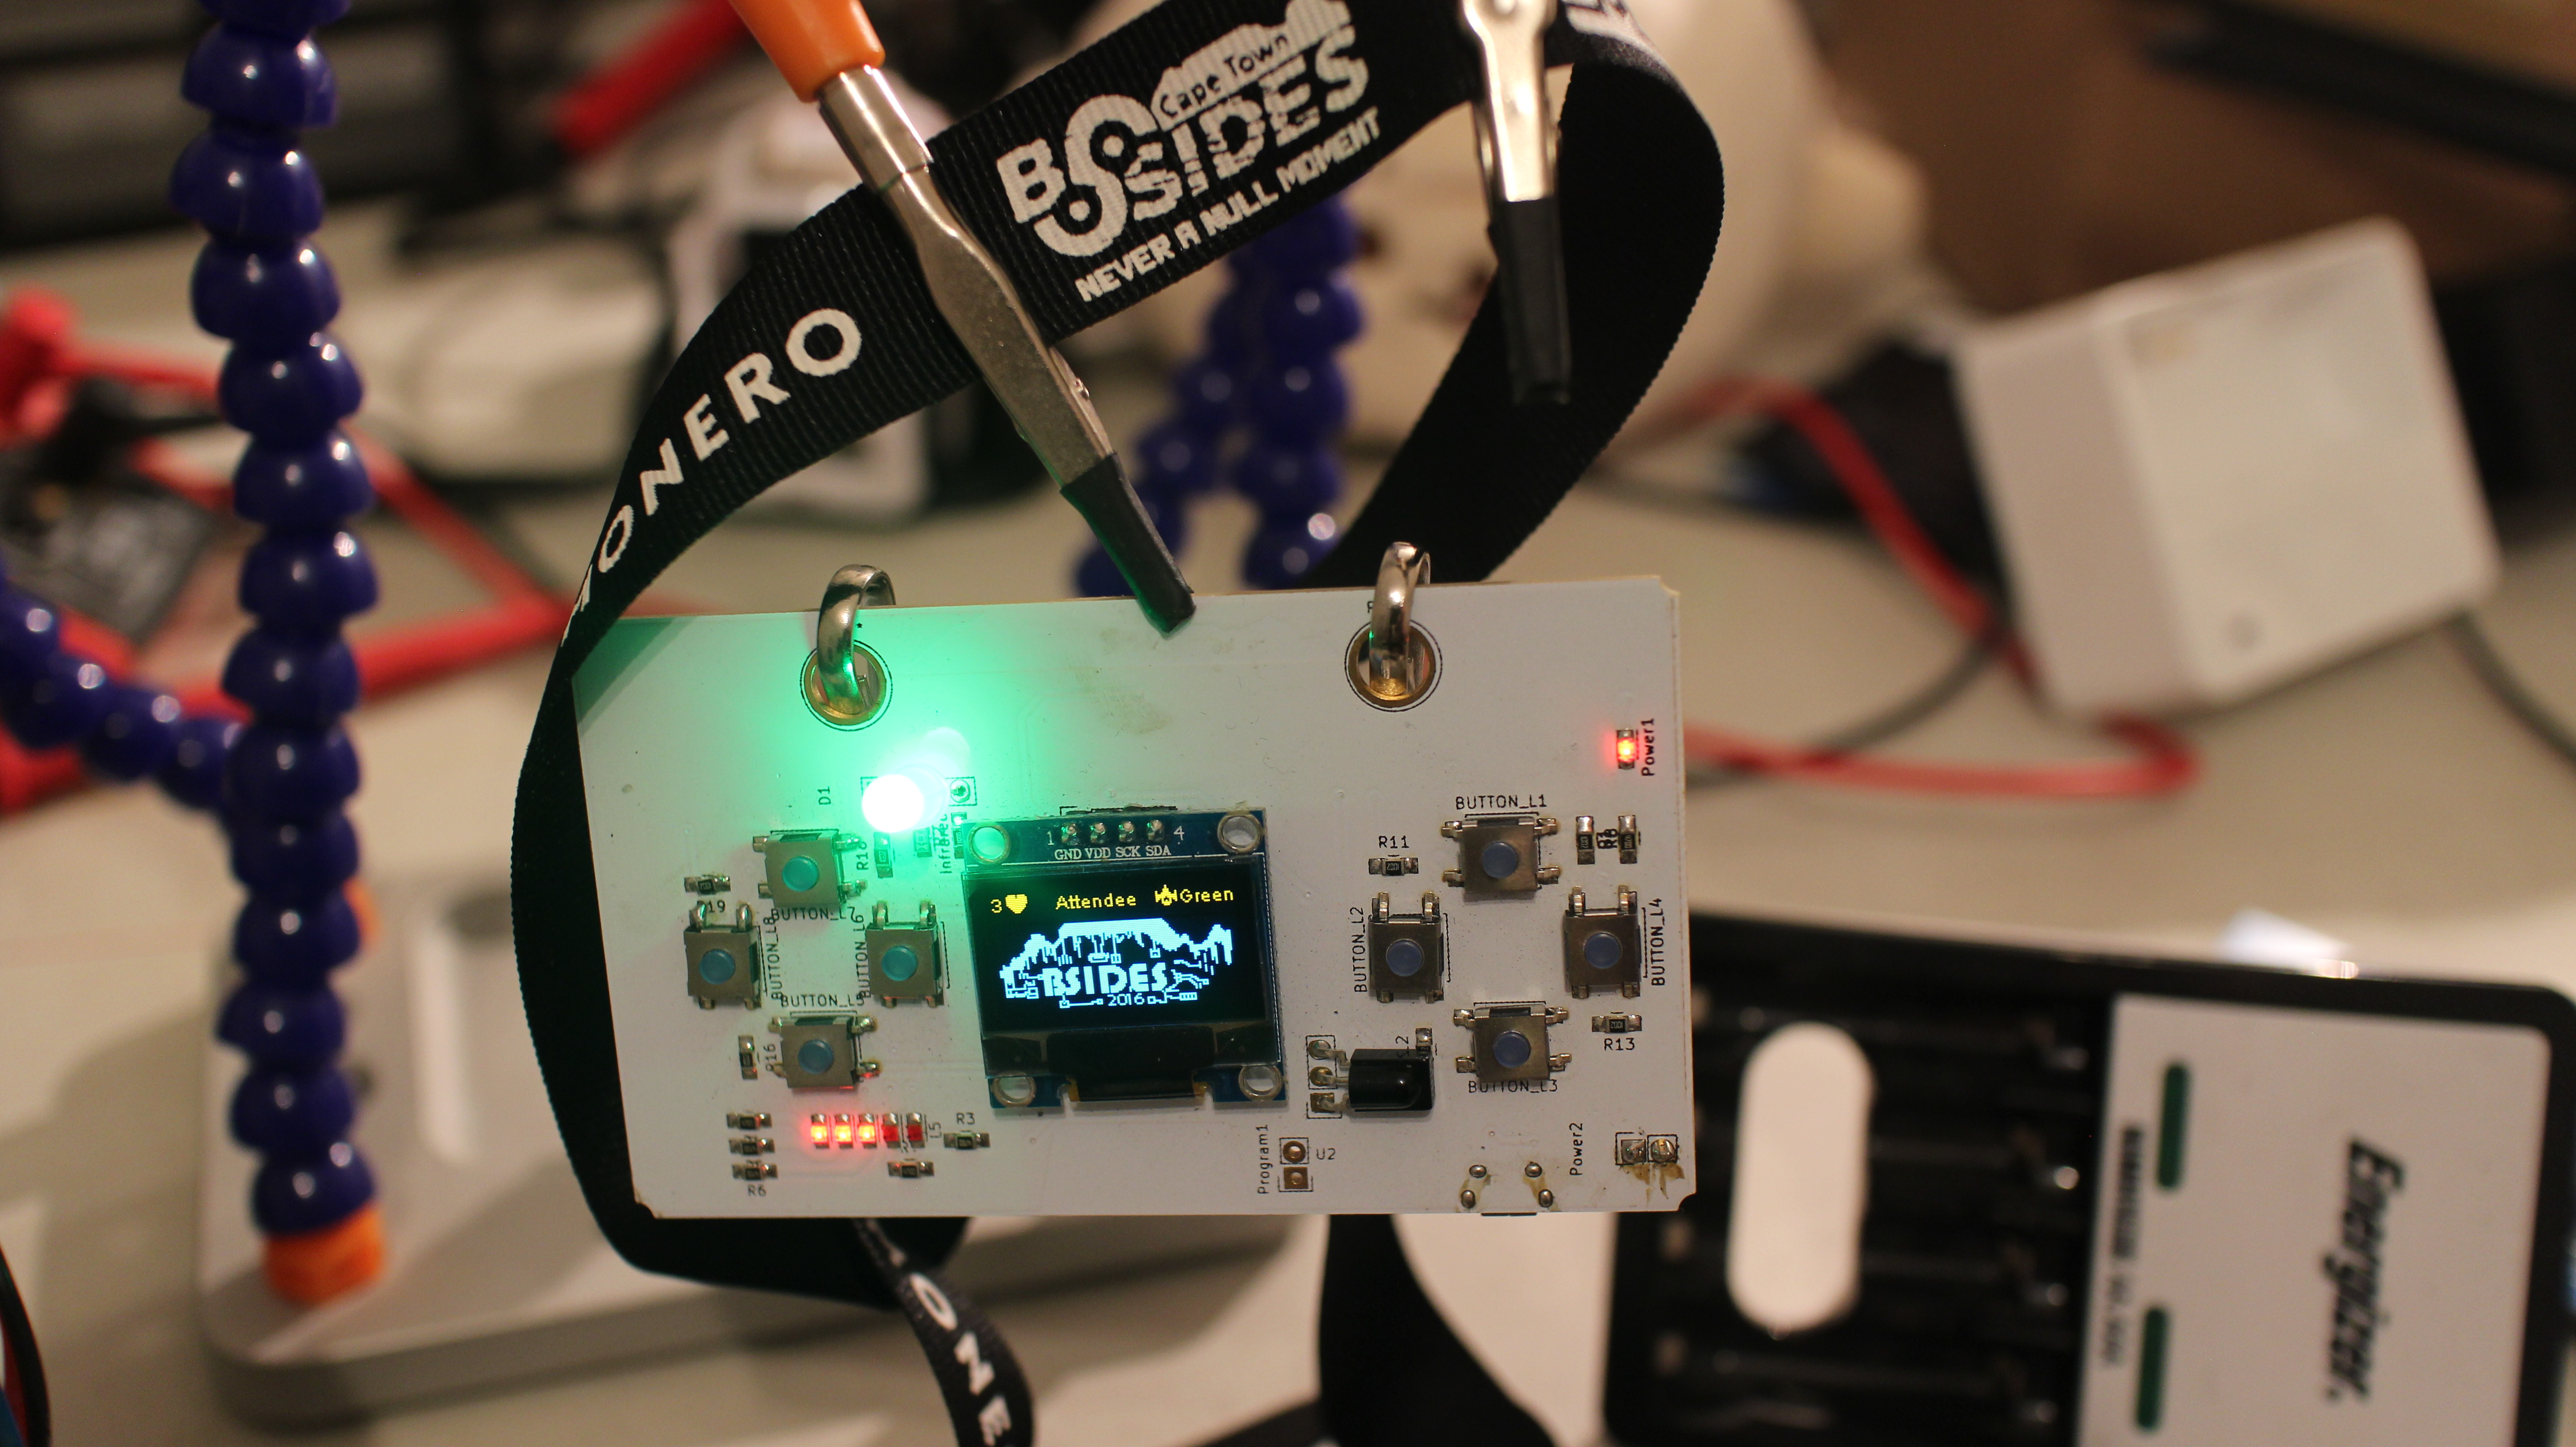
This screen simply shows the BSides Cape Town 2016 display. With your Alias (if set), the team and your level
Badge/About Screen
This screen lists the details about your badge, including the following:
- Number of challenges solved
- Code used to change the alias / other tasks
- Your Badge ID ( this was derived automatically from the MAC address of the ESP’s as they were all unique )
Schedule Screen
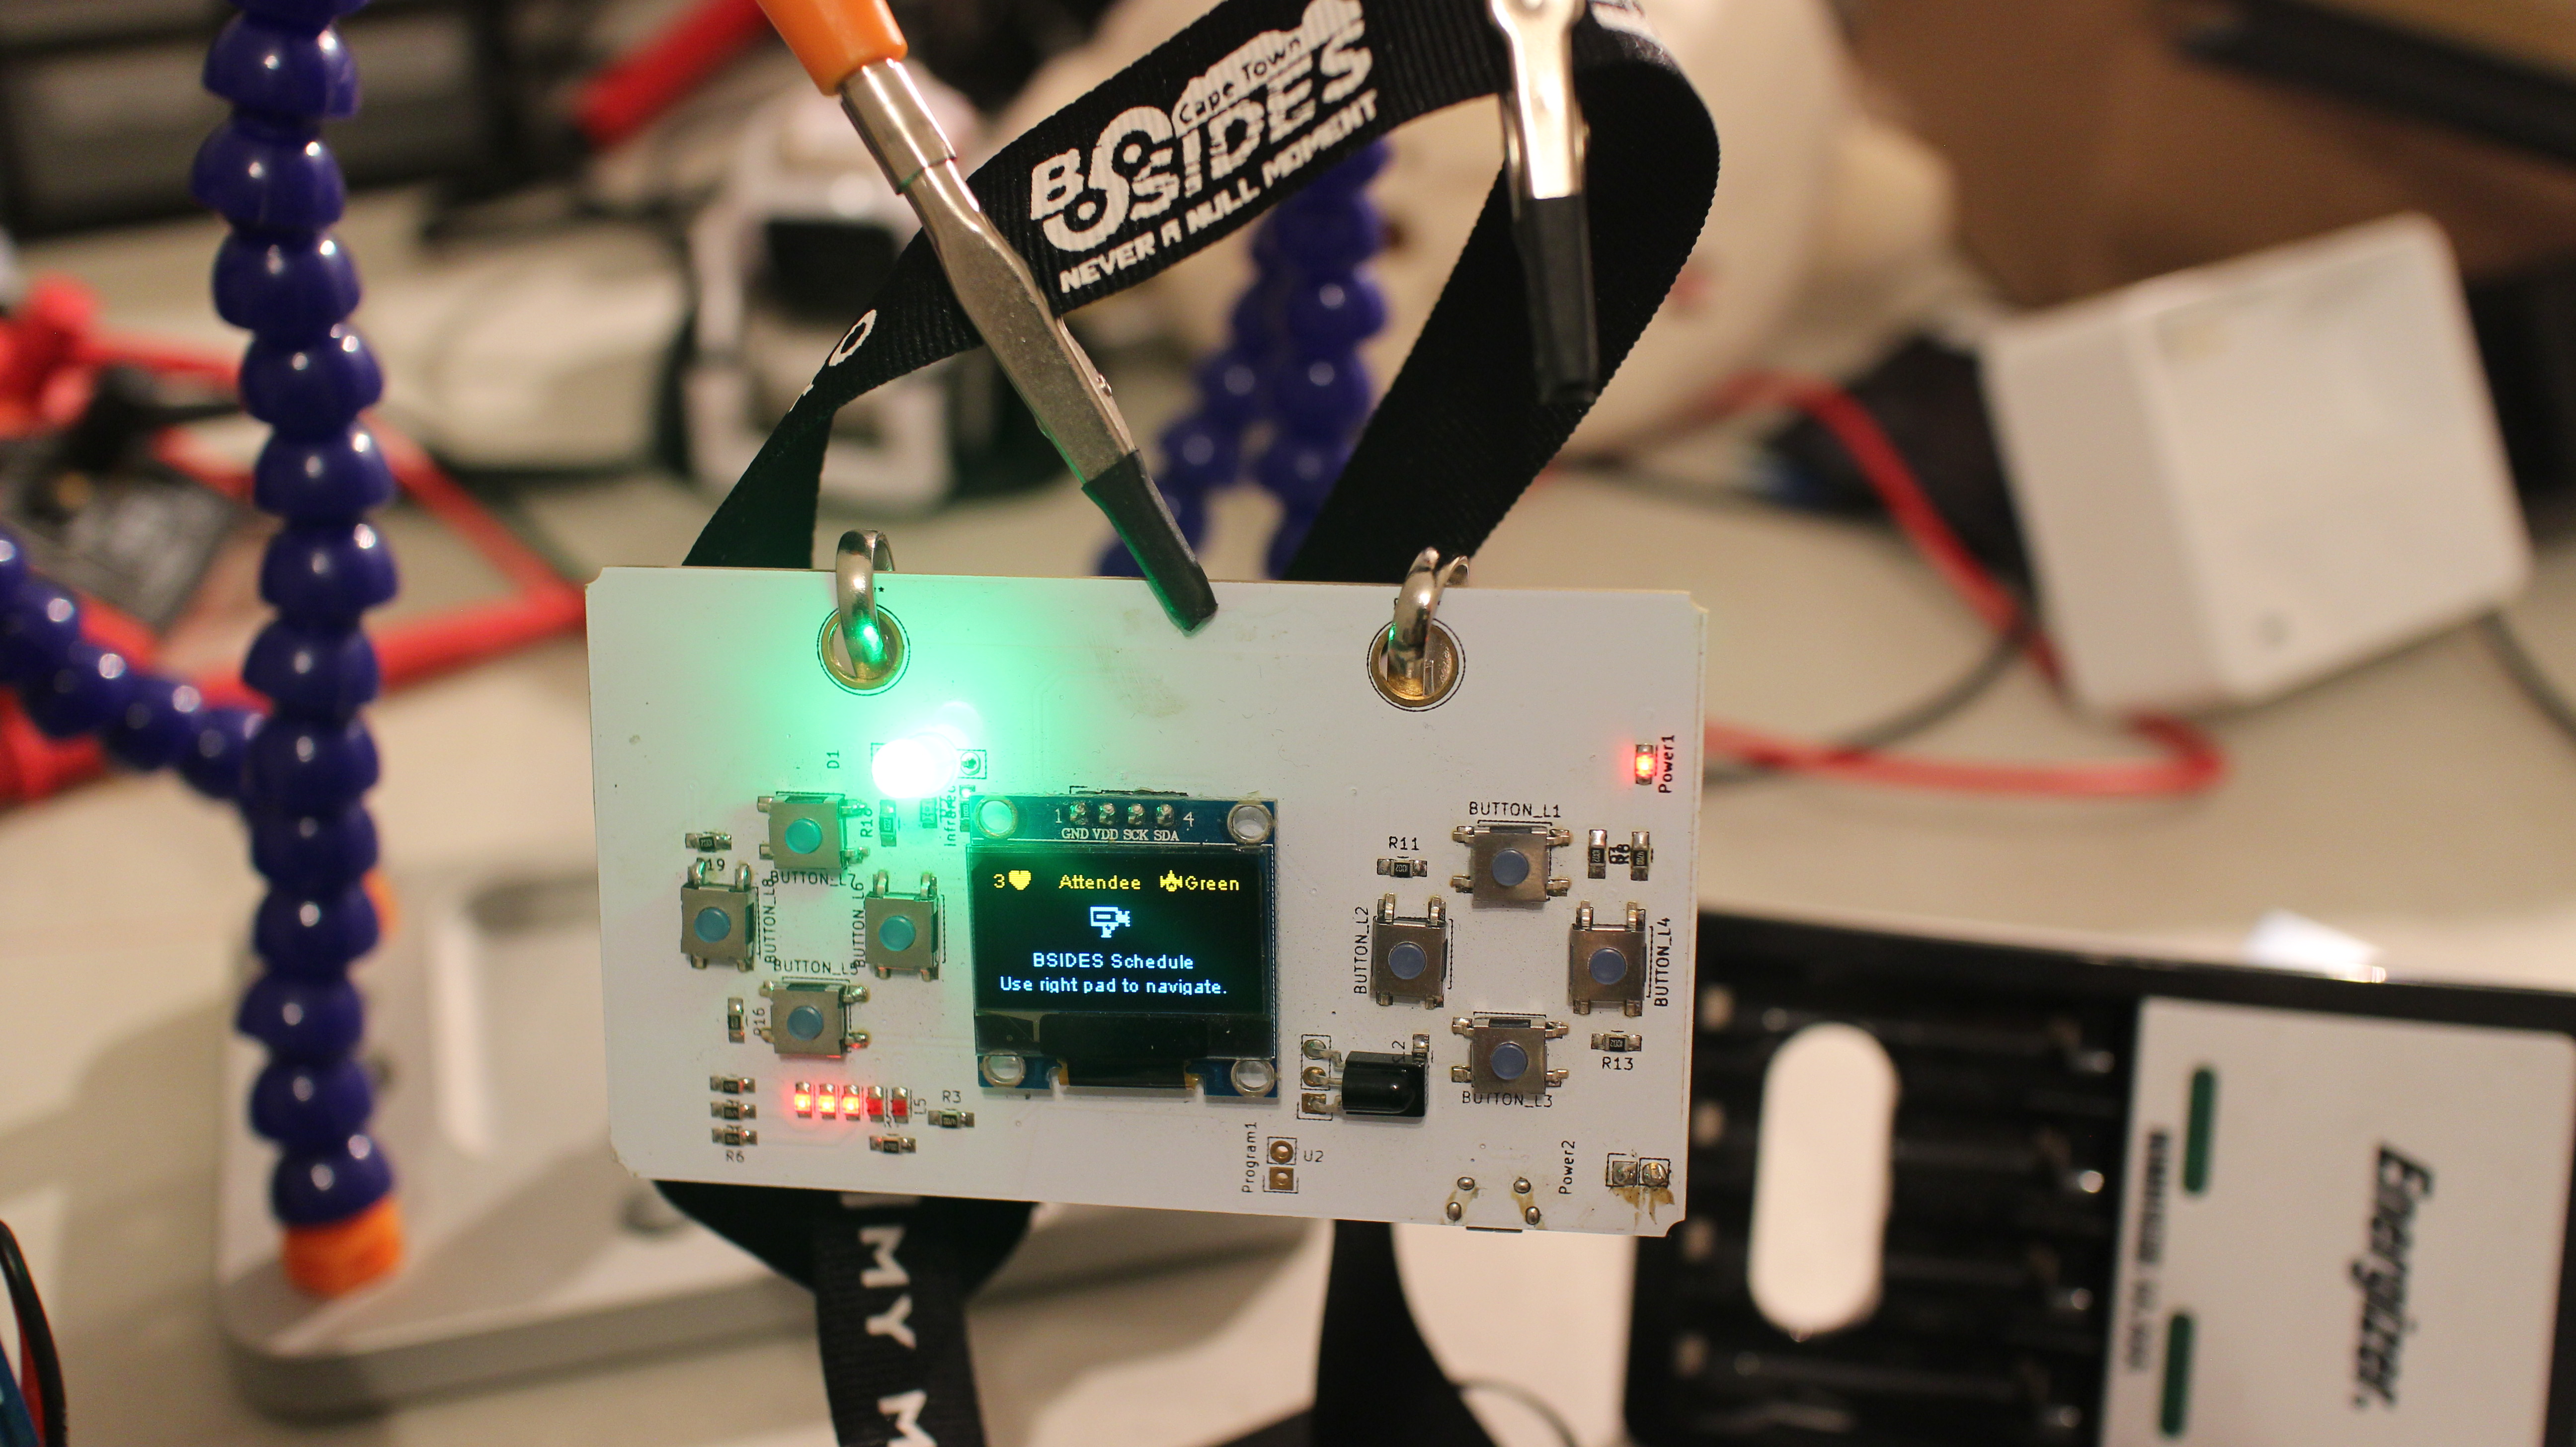
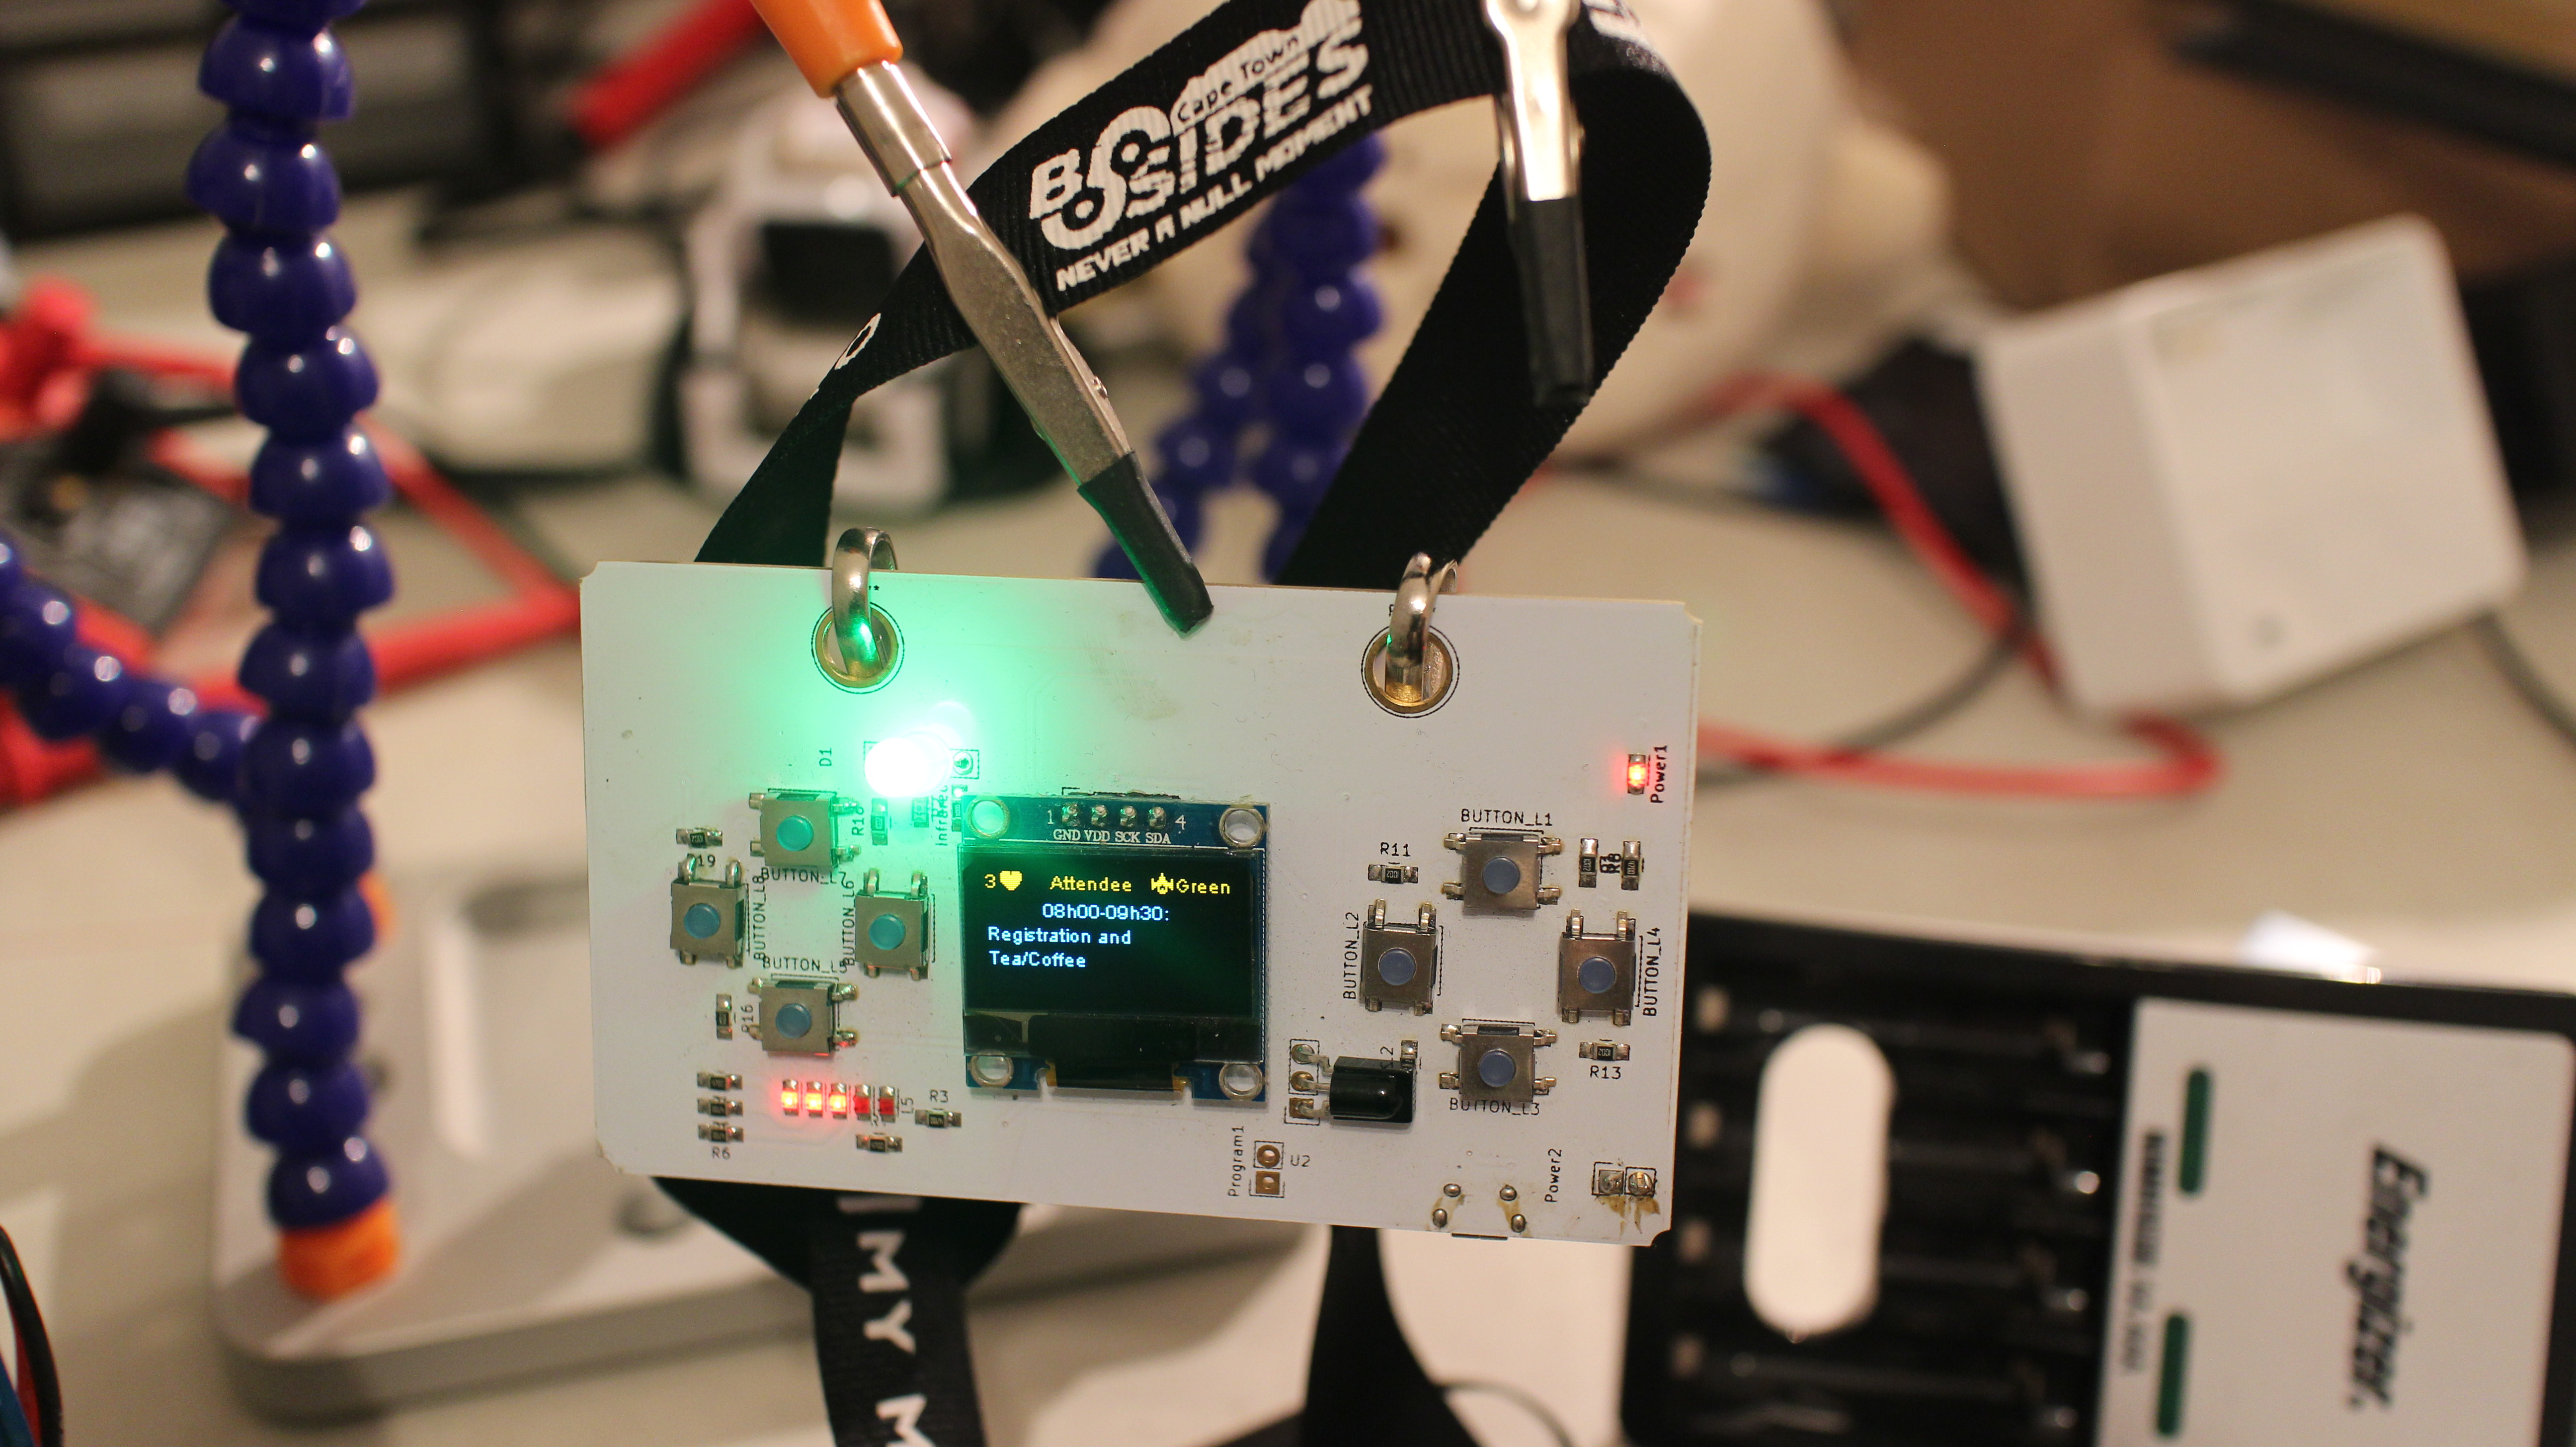
The Schedule screen shows…. the schedule. You can navigate this screen using the right hand pad
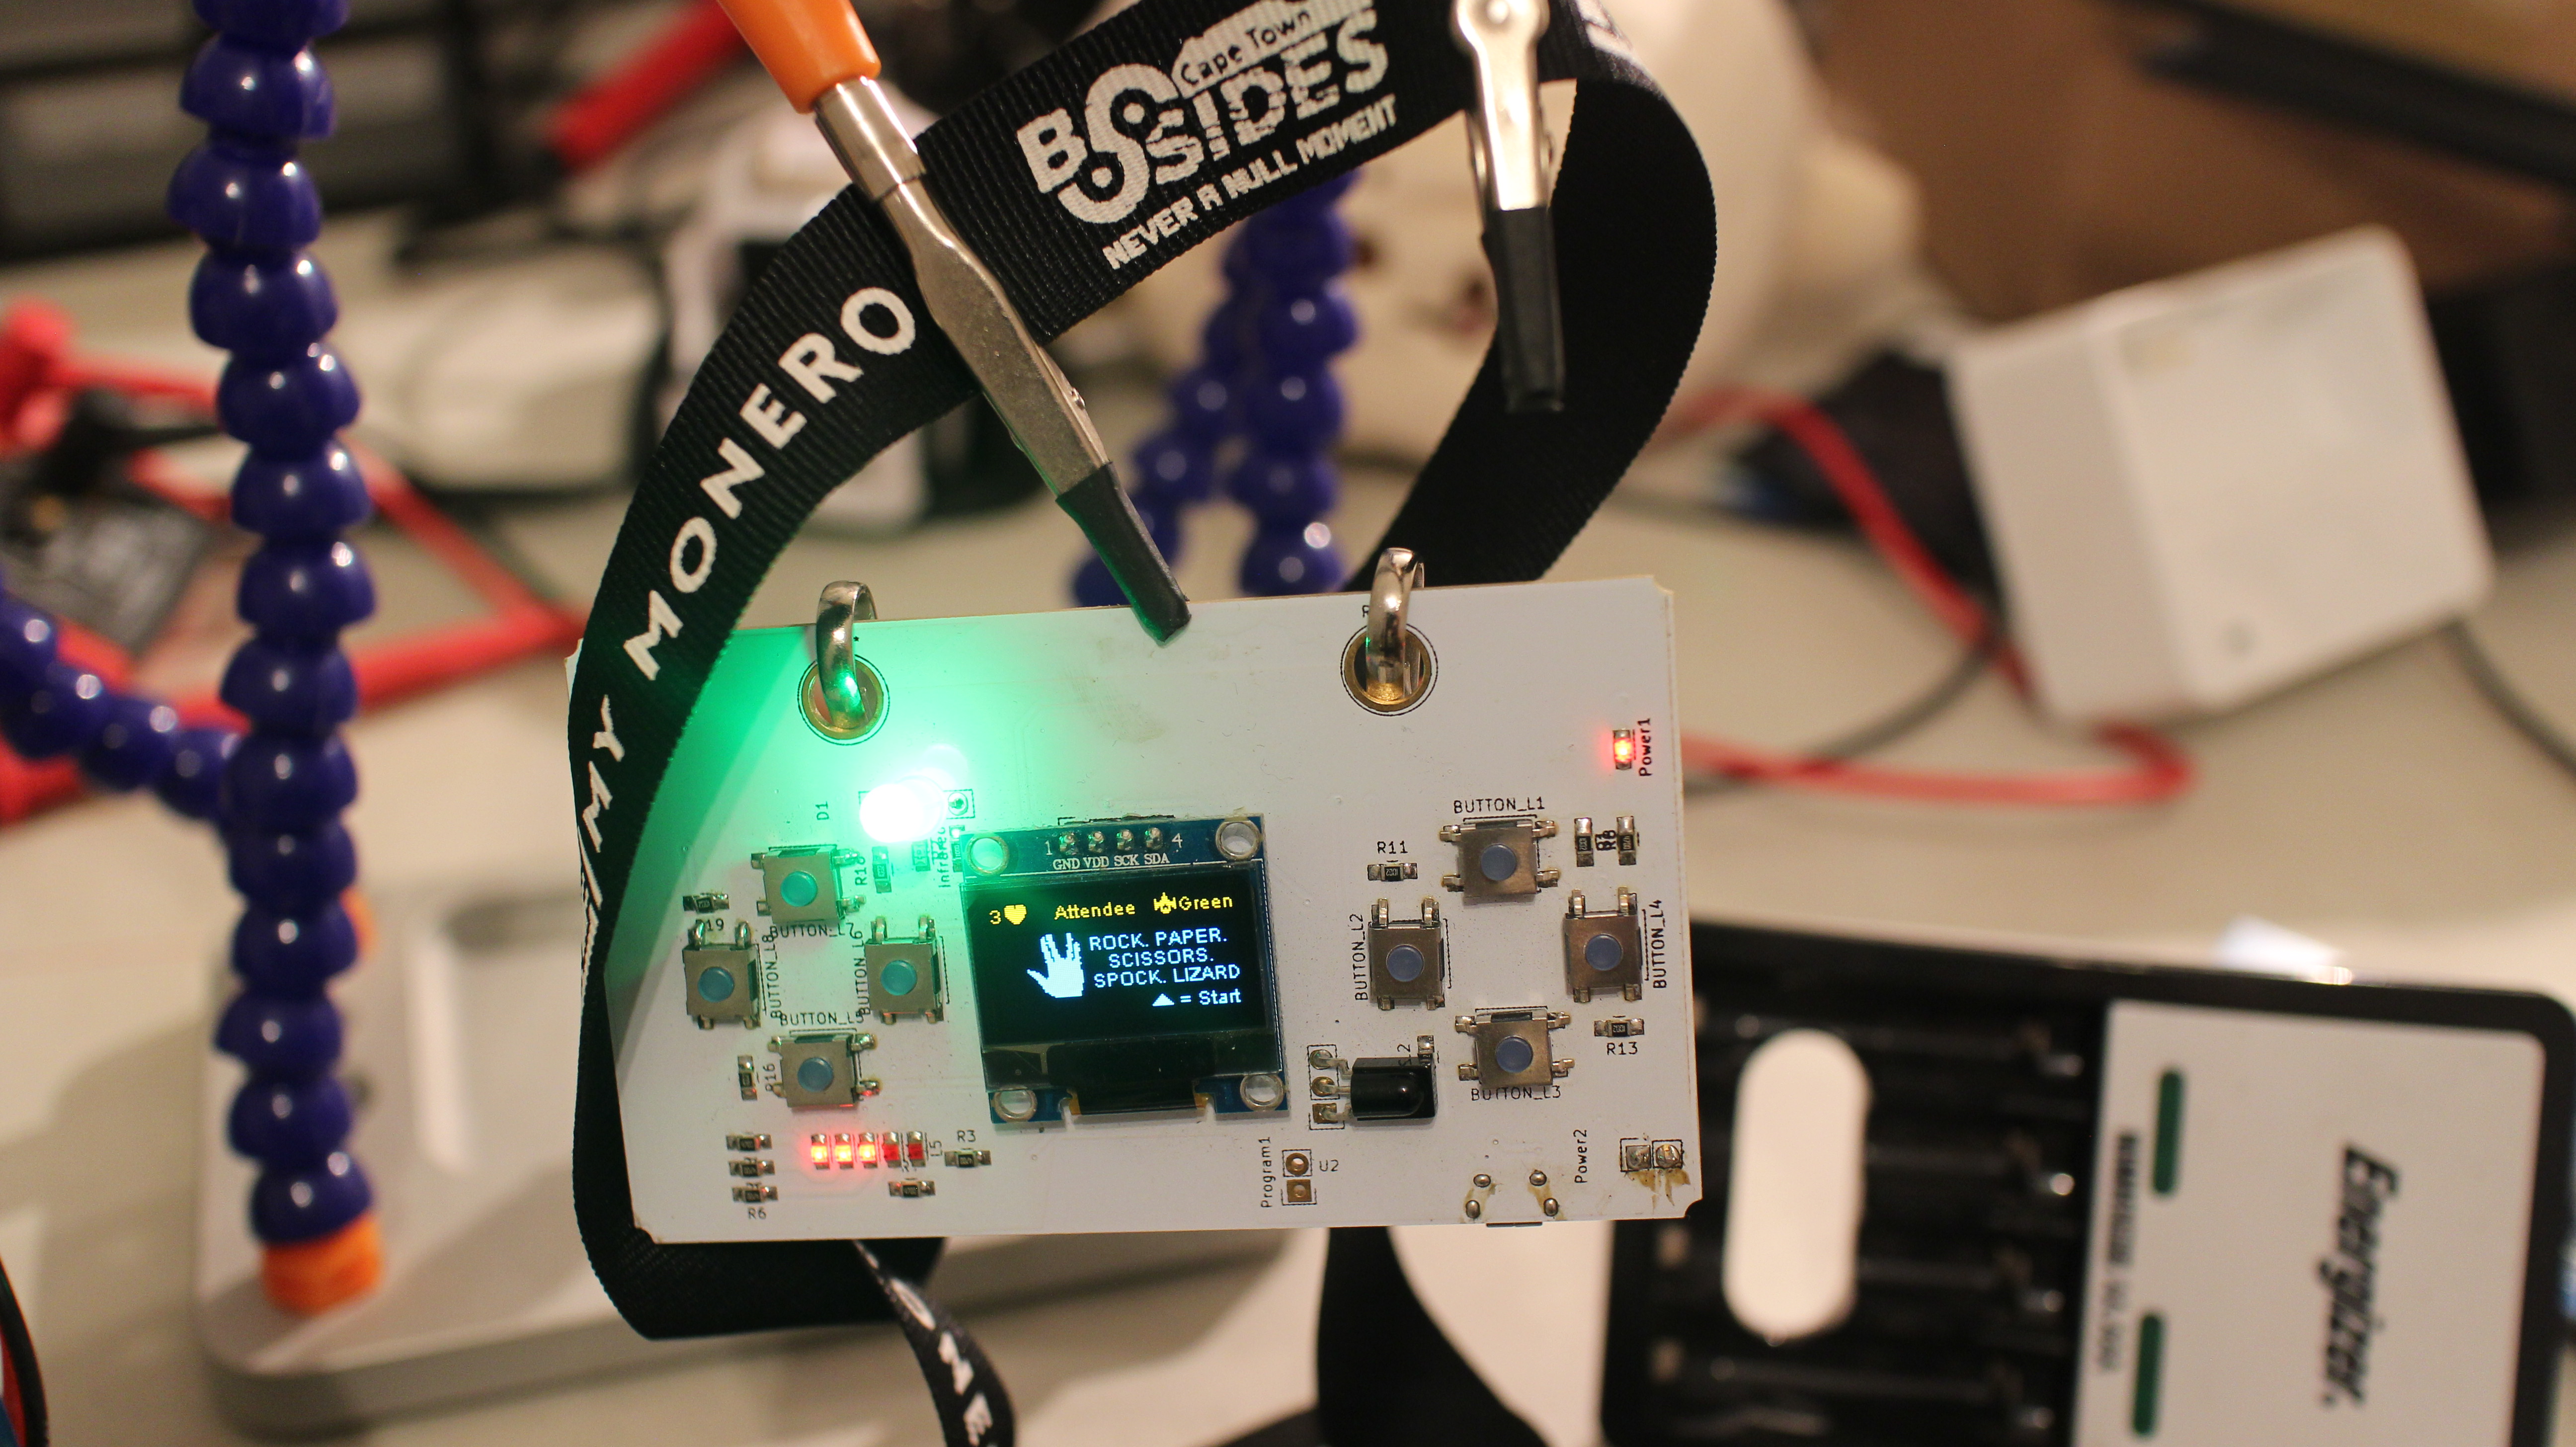
Rock Paper Scissors Spock Lizard
Fun game of Rock,Paper,Scissors,Spock,Lizard you can play against another badge!
About Page
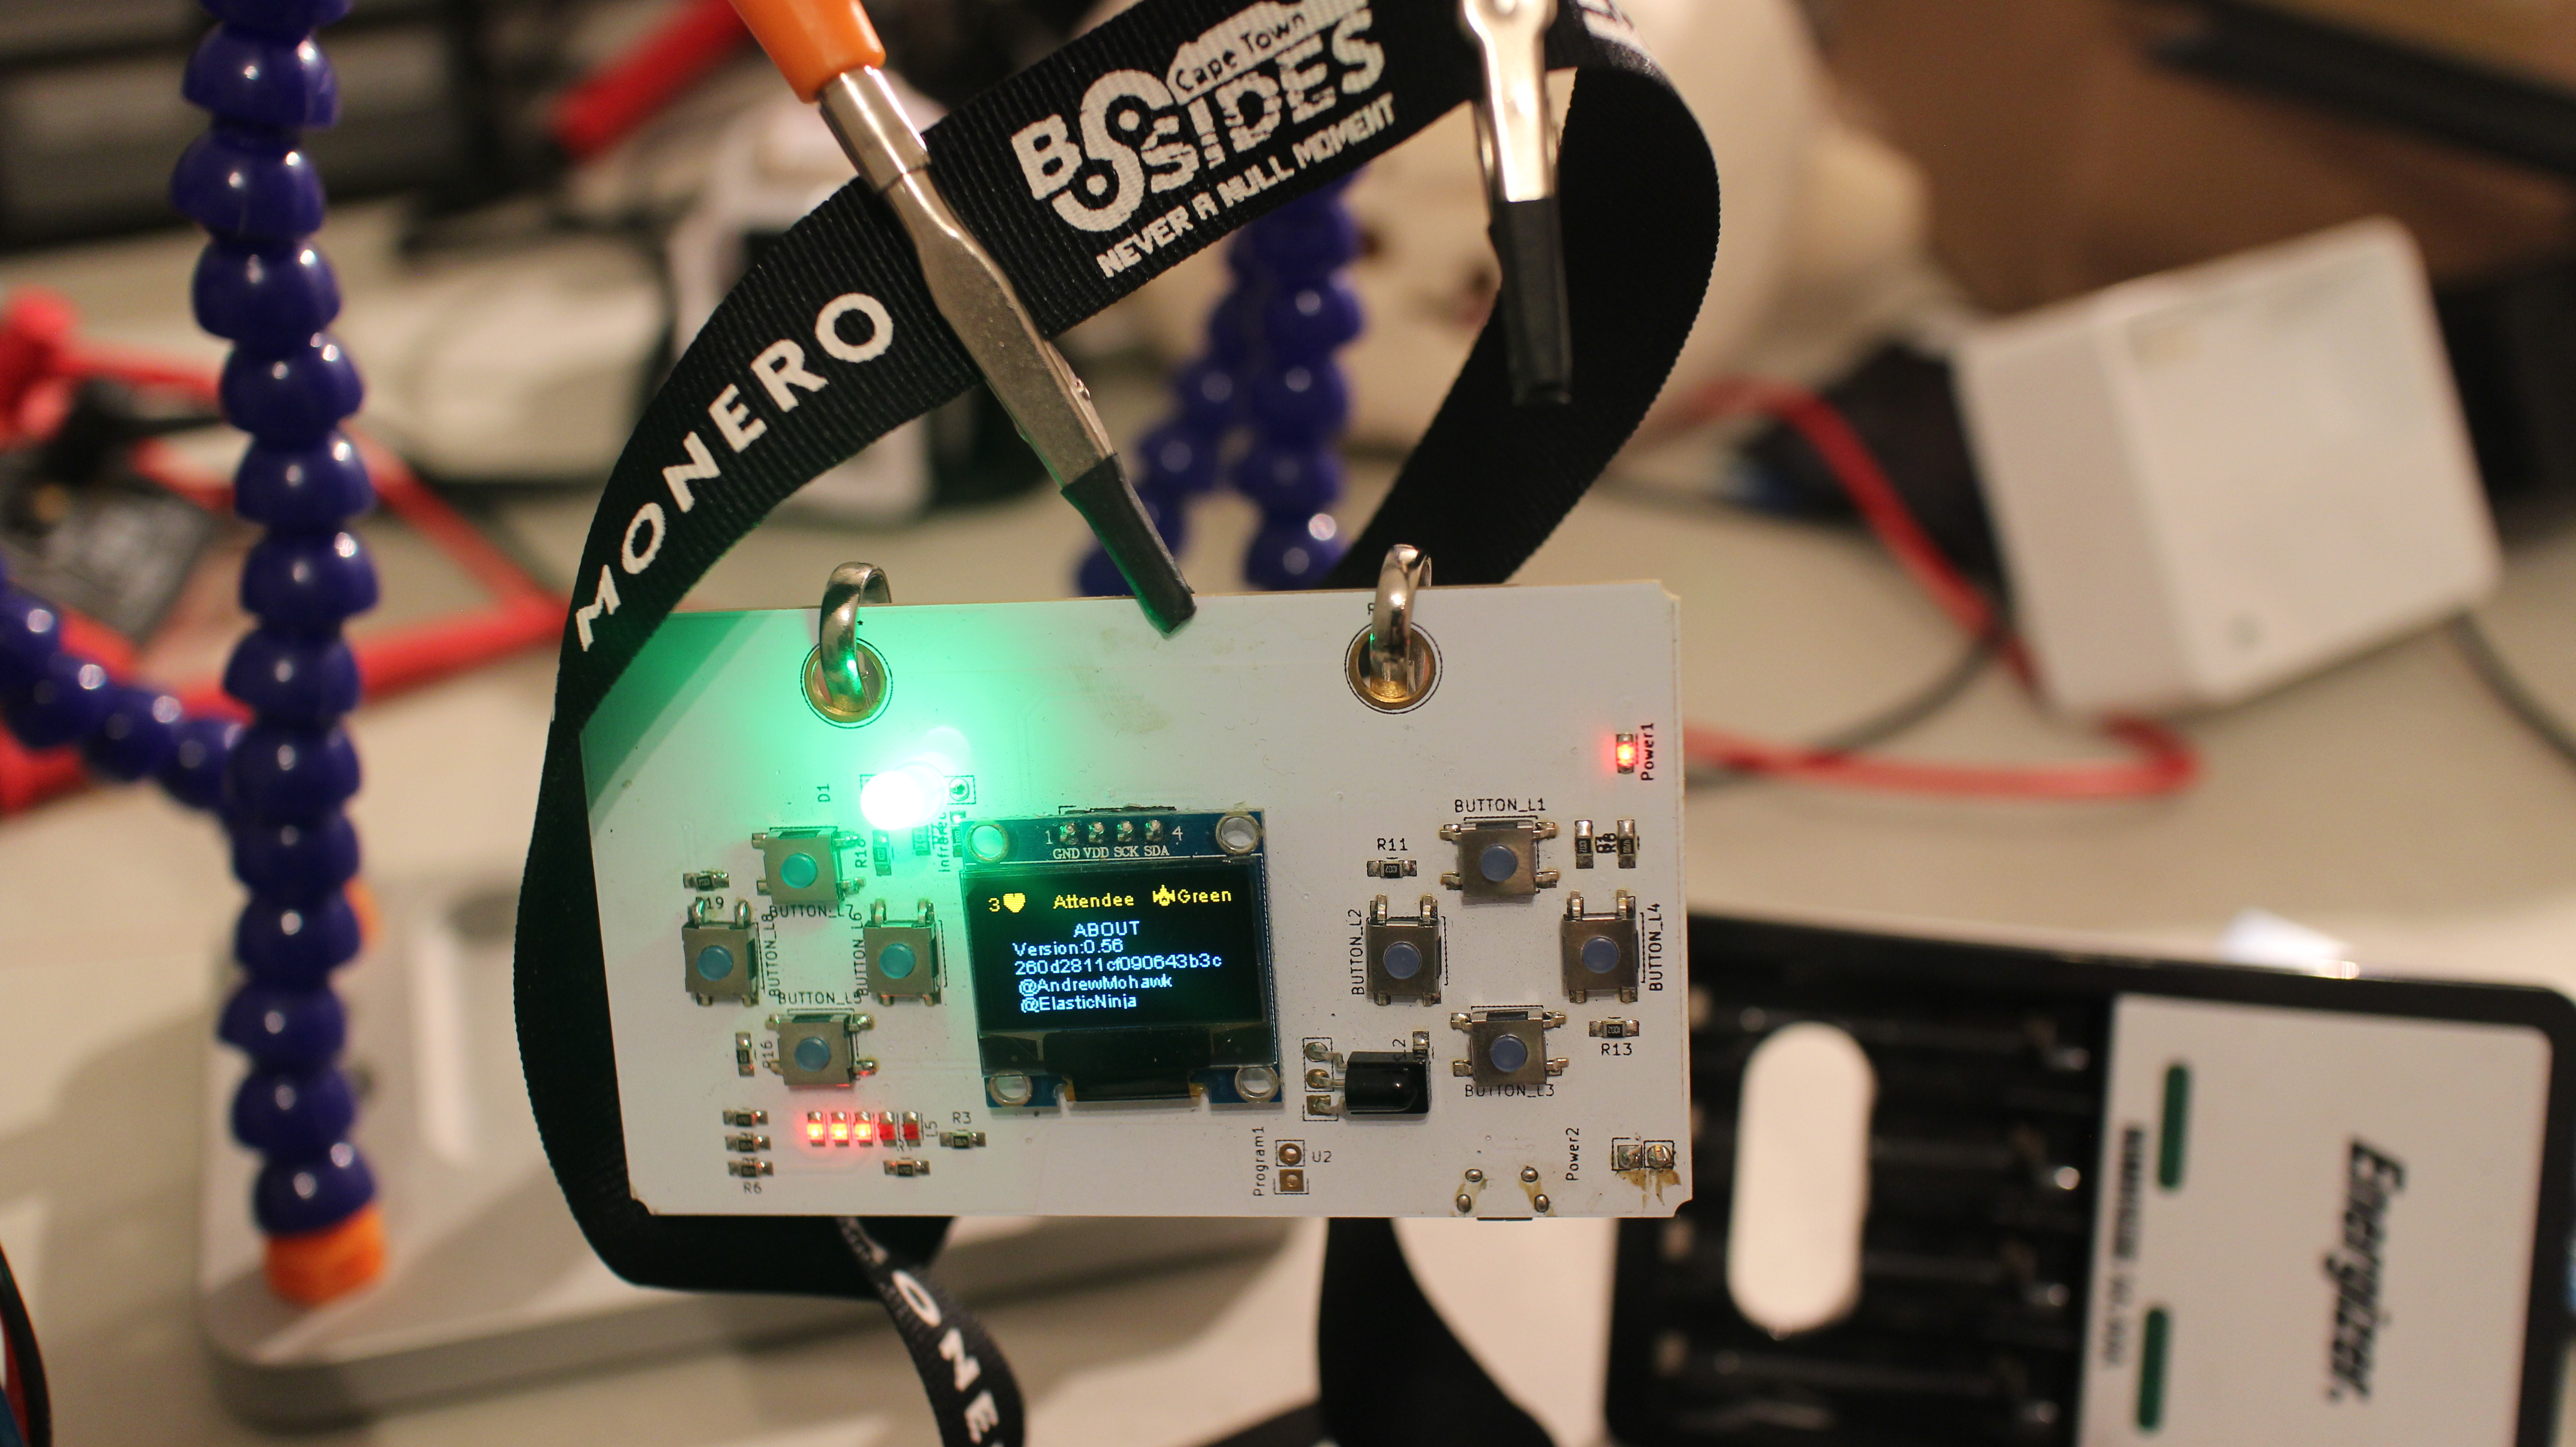
This page shows the current build and git commit status.
Challenges Screen

This screen lists the challenges that you have completed as well as give you a chance to “play” the prize if available.
The prizes could be one of the following:
* Warbadging (scan available WiFi networks)
* Pong ( 2 players on one badge with either numpad)
* Skeleton Dance
* Alias Waterfall
Hidden Artifacts
By solving the various challenges you could unlock certain parts of the badge which were as follows:
Warbadging
Warbadging is where you can use the badge to scan for Wireless networks. It will scan up to 30 networks and allow you to scroll through them. It will show you the signal strength, ESSID and what encryption the network is running ( WPA = WP, WPA2 = W2, OPEN = OP, AUTO = AU, Unknown = ??). You can use this to take with you to find wireless networks. It will also scan all the channels!
PONG
The Pong application lets you play pong against another player by holding the badge with the screen between you and the other person!
First person to five wins.
Skeleton!
Get an adorable 8 bit skeleton to run across your screen
Alias Rainfall
Have your alias rain down in a cheesy animation from the top to the bottom of the screen.
Conclusion
Overall as always the badges were awesome to see in action, it was cool to see the game moving in realtime on screens and people trying to solve the challenges to unlock the various rewards. It was a lot of work that we all put in and I’m glad the badges didnt explode/stop working/became something people enjoyed. Special thanks to @elasticninja, @shifttymike and @fluffyponyza for being part of the team either with skillz or dollarz and letting us do it! To the people who worked hard on the challenges, thanks to @singe as well as @hypnza And of course a big thanks for the BSides Cape town team for encouraging us, funding us, and letting us go to town!
[…] can’t get enough of hacker-con badges. BSides Cape Town, held Last December, featured an IR-equipped badge that immersed attendees in a game while they […]
[…] can’t get enough of hacker-con badges. BSides Cape Town, held Last December, featured an IR-equipped badge that immersed attendees in a game while they […]
Amazing! Thousand likes for your stunning work in Cape Town! Indeed a good story at a time when really ZA needs it!
[…] can’t get enough of hacker-con badges. BSides Cape Town, held Last December, featured an IR-equipped badge that immersed attendees in a game while they […]
[…] the back of that I got the BSides Cape Town 2016 badge which had some epic hardware on it too and for the past 6 or so months I have consistently been […]
[…] ハッカーコンバッジを十分に取得できません。昨年12月に開催されたBSidesケープタウンでは、 IRを搭載したバッジ を使用して、参加者がチャットしながらゲームに没頭しました。 […]
[…] 昨年12月に開催されたBSidesケープタウンでは、 IRを搭載したバッジ を使用して、参加者がチャットしながらゲームに没頭しました。 […]